

Ok, this was a little strange to fix… here’s the problem I was facing. I recently swapped out my PNY RTX 5070 OC 12gb gpu for a AMD RX 9070 16gb ASrock Challenger and figured I would get better performance and higher quality thanks to more VRAM. However when I swapped the RTX out for some reason when I fired up Destiny 2 and did some Sorrows Harbor on the Moon like usual, it seemed like I was playing at 30 fps but the Overlay was telling me 60. I realize this is all personal opinion, but it was as if I was missing frames and everything on the screen just seemed a bit jittery. I didn’t see any hitching or micro freezes. Input lag and everything else felt fine and my logs showed everything working pretty well together. There were some frame time spikes every now and then, but again it was all running at 60fps no lag. I don’t know if you remember sprite animation back in the day but it was kind of like that.
Now all my settings on my TV and in Destiny 2 didn’t change when I put the new 9070 card in, also I used the Nvidia clean utility and also the DDU cleaner utility to remove the old drivers before adding the AMD card.
Here are my TV and my PC specs:
- LG OLED C1 48in TV
- 9900x3D
- 64Gb of DDR5 Ram
- Gen5 Nvme
- AMD RX 9070 ASrock Challenger 16Gb (previously PNY RTX 5070 OC)
- Windows 11
I should have more than enough juice and power for everything, it all ran great with the 5070. I did a ton of back and forth with Grok and with different settings, and have compiled a list of screenshots of all my TV, AMD Adrenaline, and Destiny 2 games settings. Side note I generally play at 60fps because I do some recording with OBS and imo I can’t really tell the diff too much past 60, its good enough for me. If you want higher frames than just turn off the frame lock in Destiny 2.
All the settings below are my personal preference and it’s what looks pretty good to me. I wanted the 9070 to be close to or better than the experience with the RTX 5070 and the PS5 version. I have a belief based on just personal experience that AMD just has better looking gameplay than Nvidia, the colors, the character and depth of the image and HDR.
I hope these settings fix any of your issues and if they do PLEASE leave me a comment below, and add your pc specs too! I’d like to know what other people are using.
The FIX, well hopefully it works for you too.
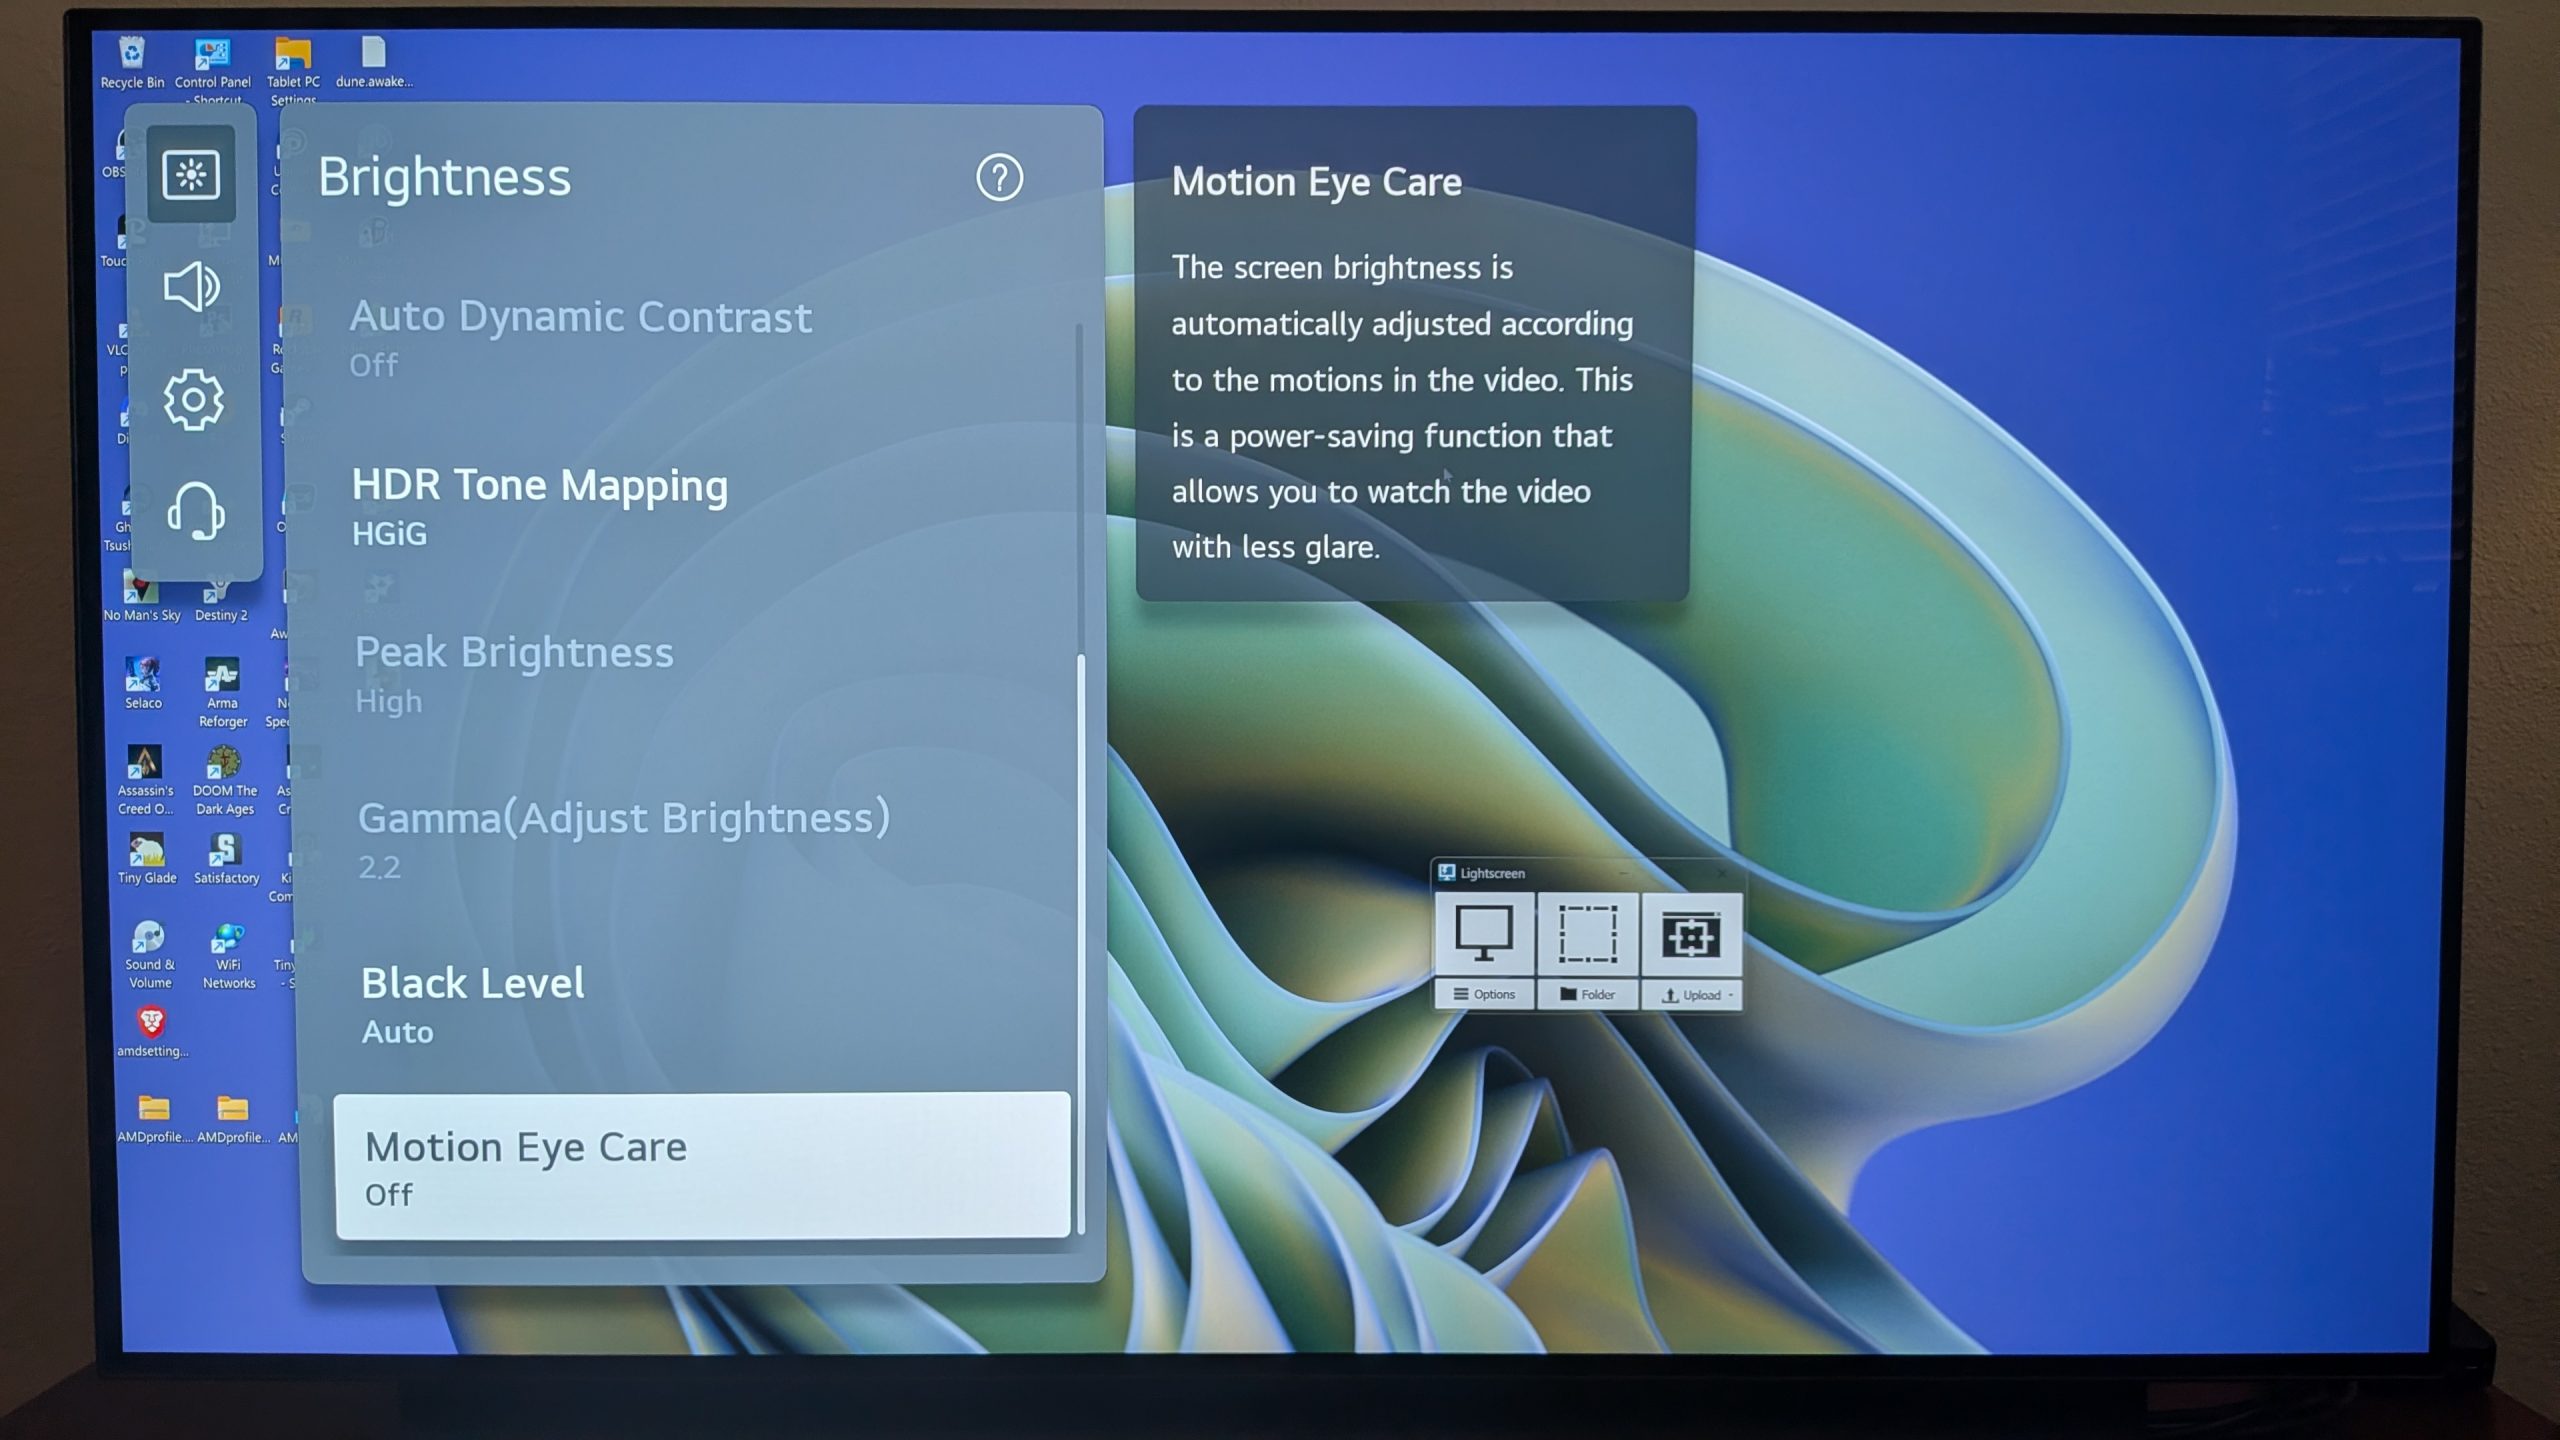
TV Settings, make sure you set your input in the Home Dashboard to be a PC icon instead of just an HDMI one. The tv handles the PC signal differently.

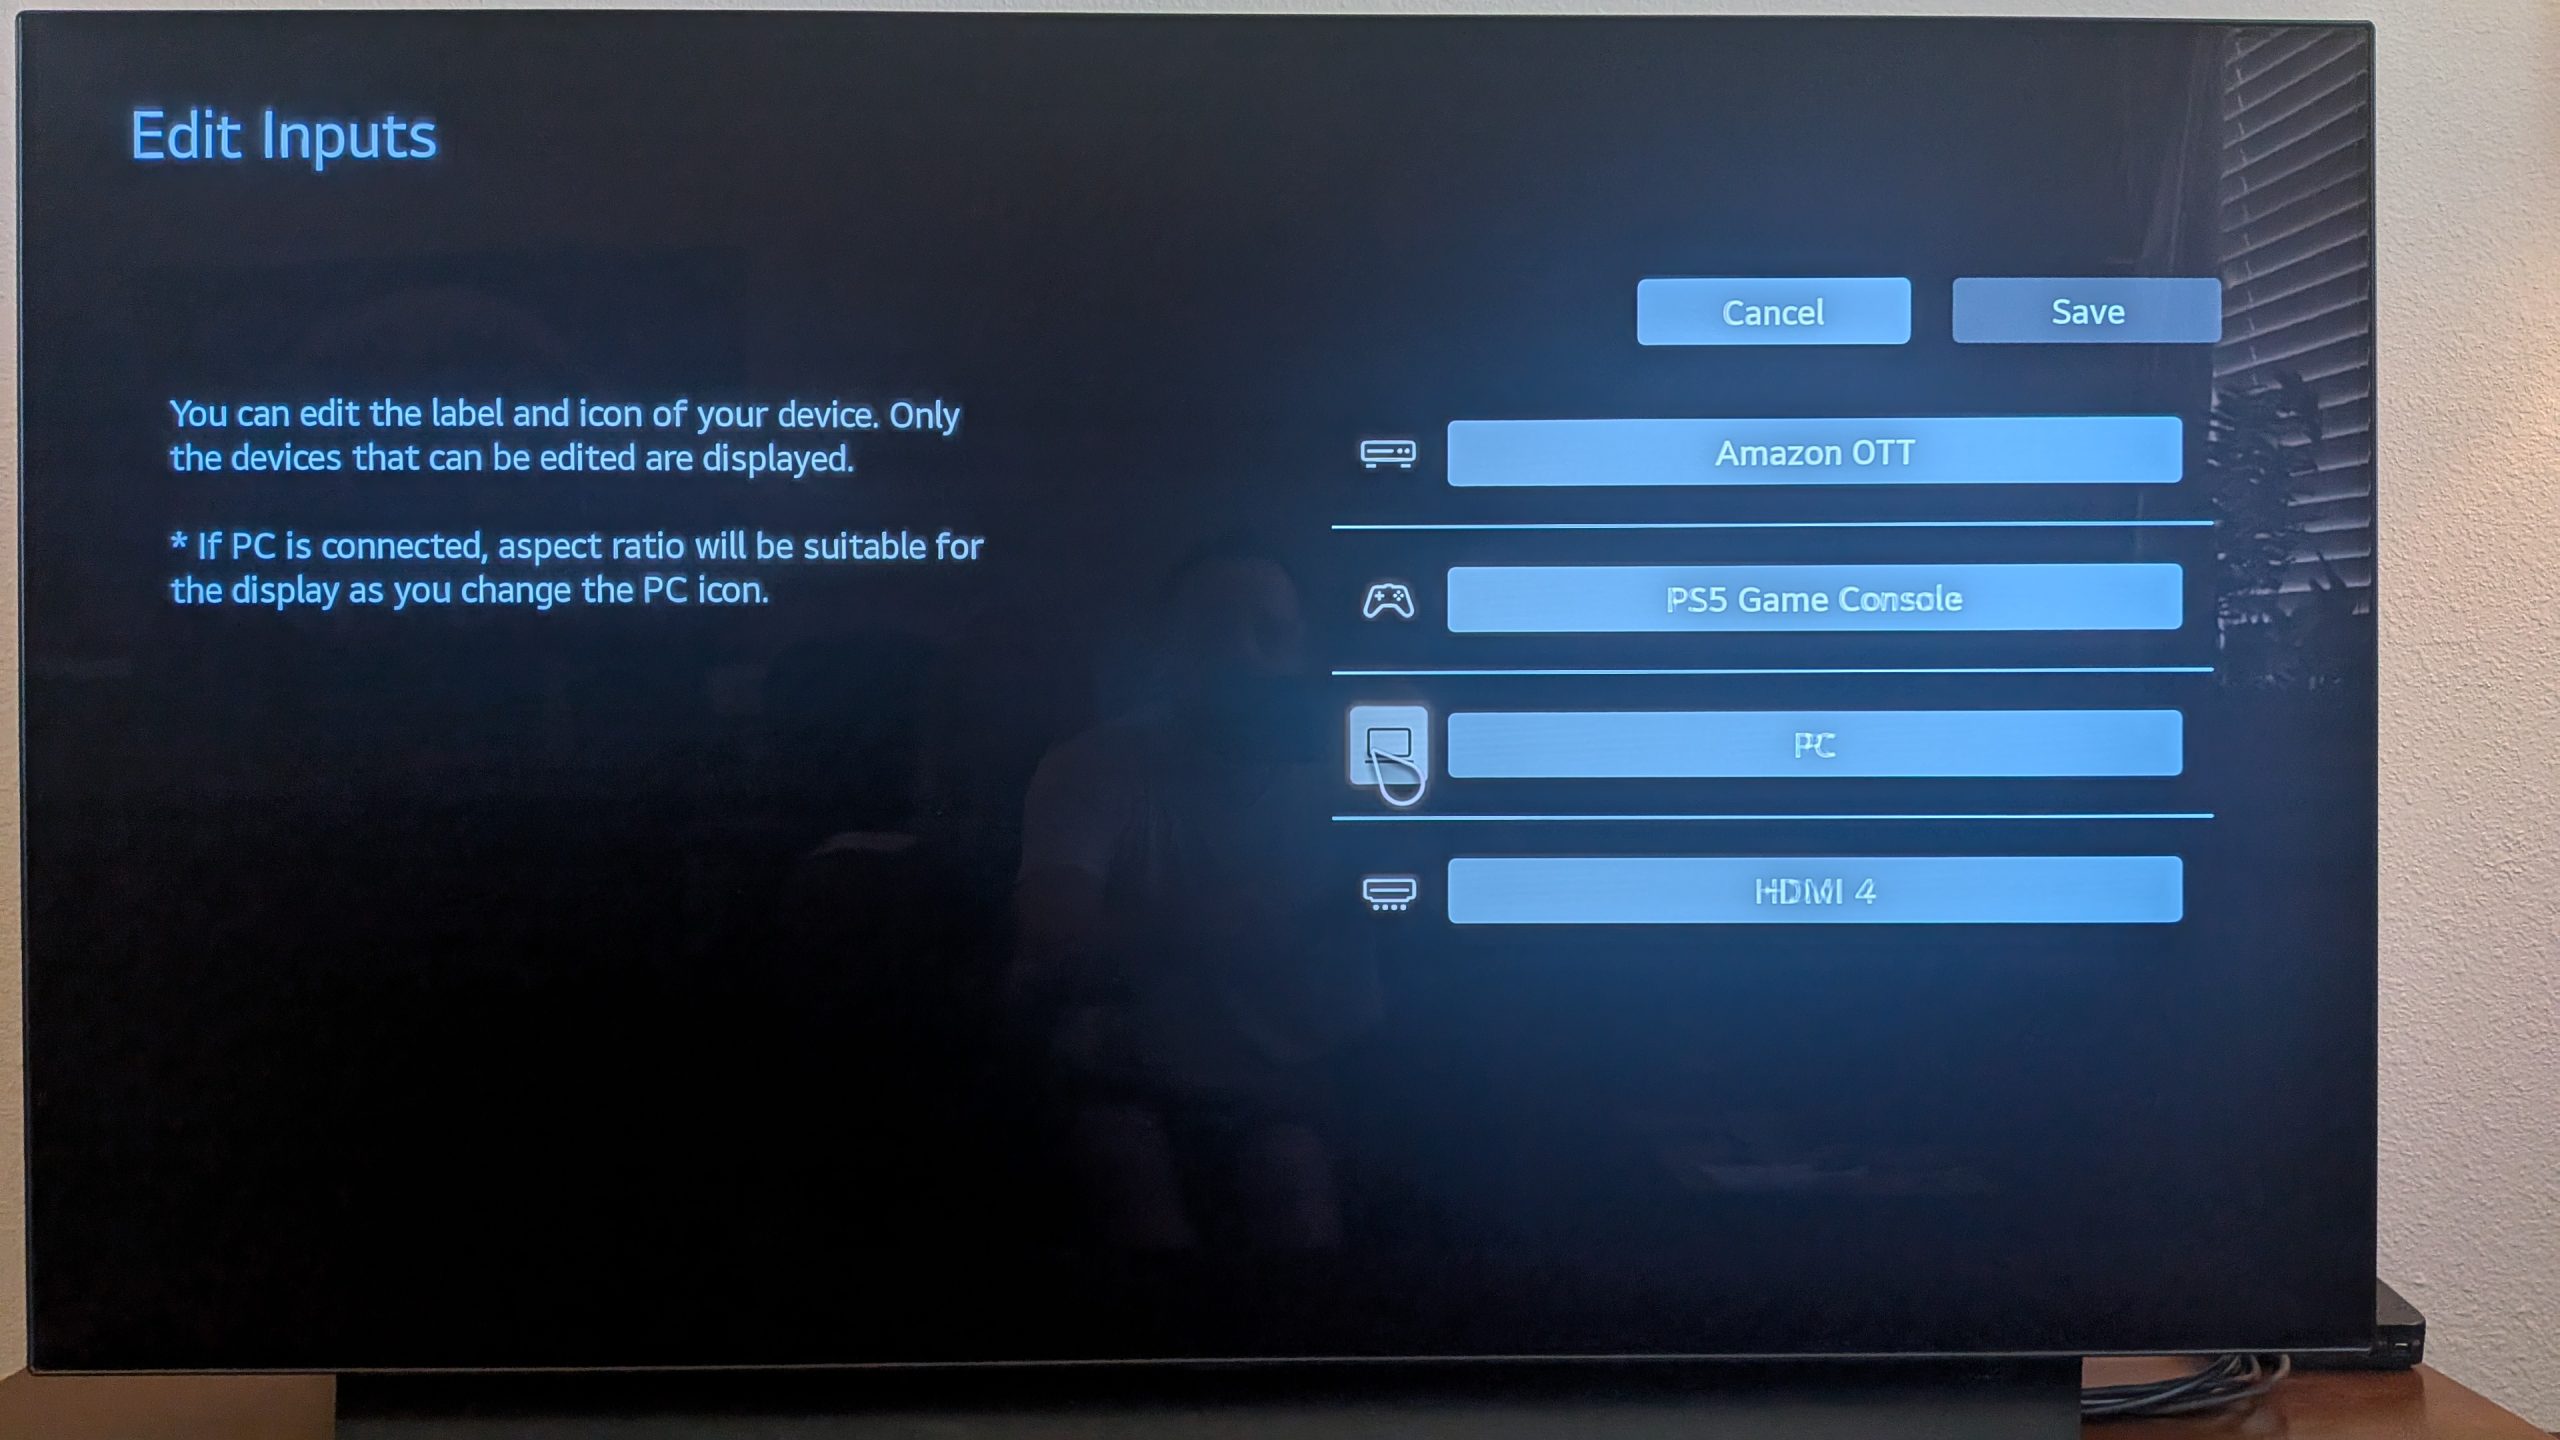
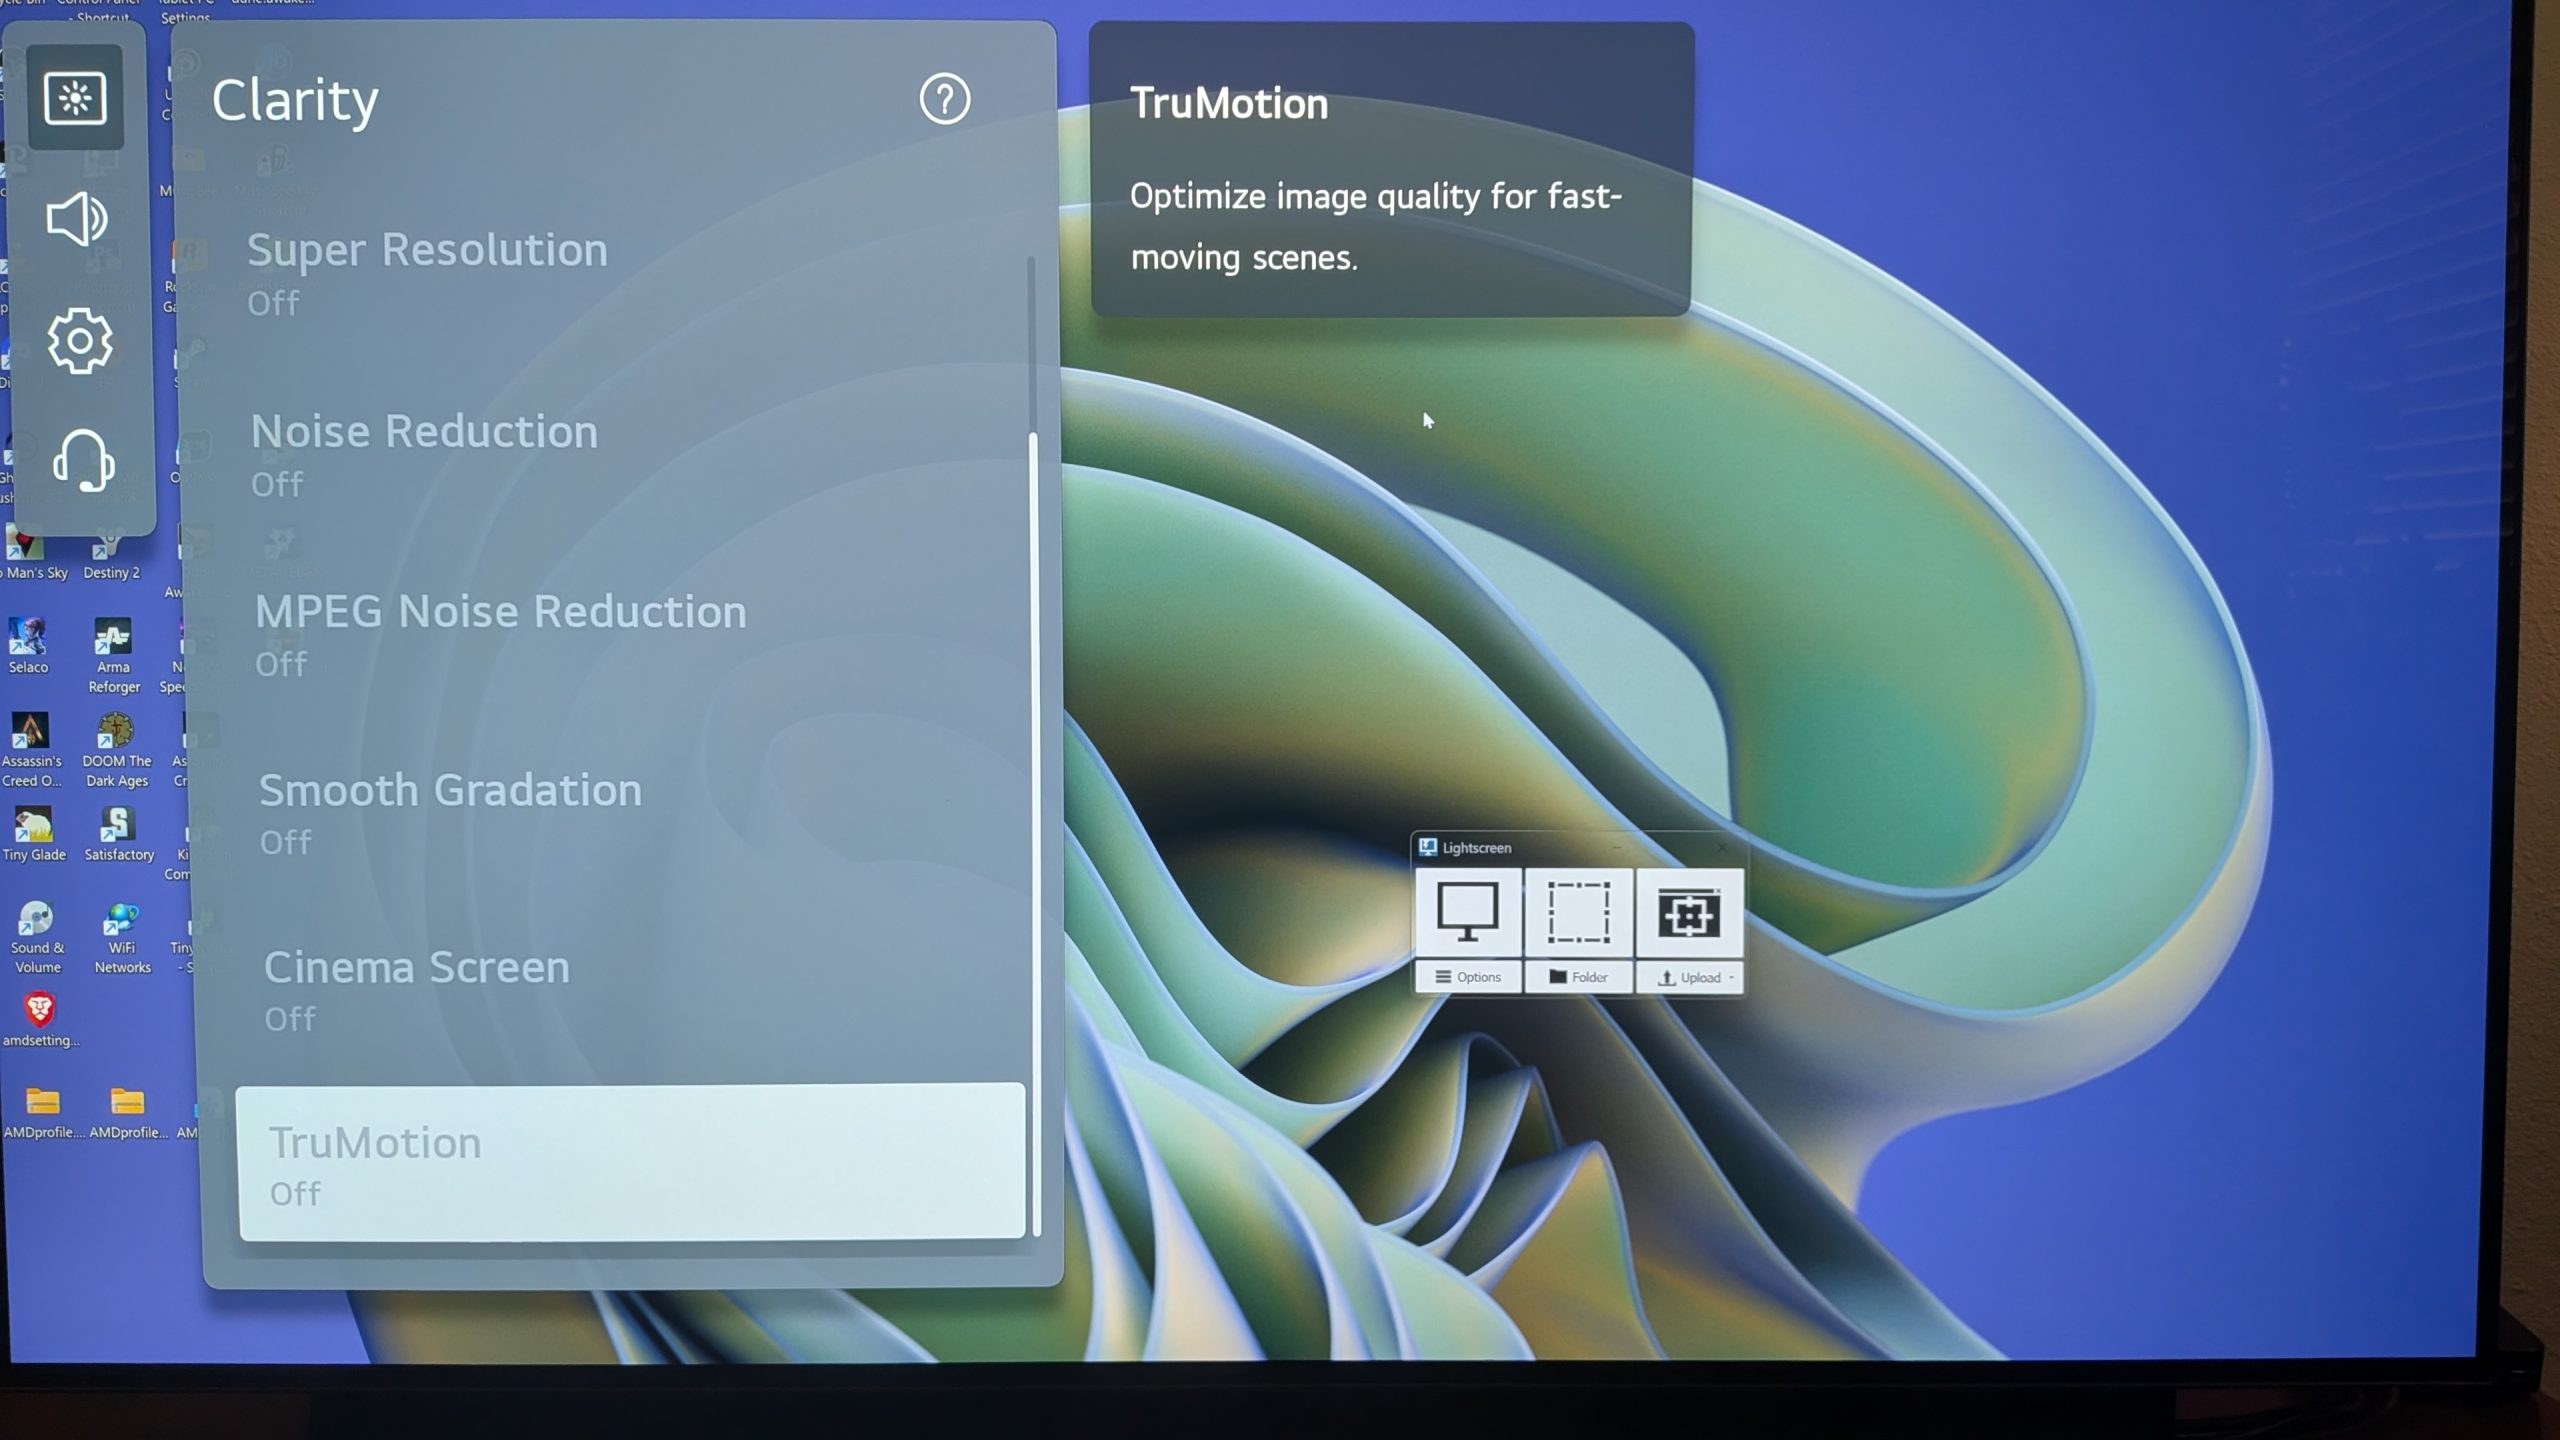
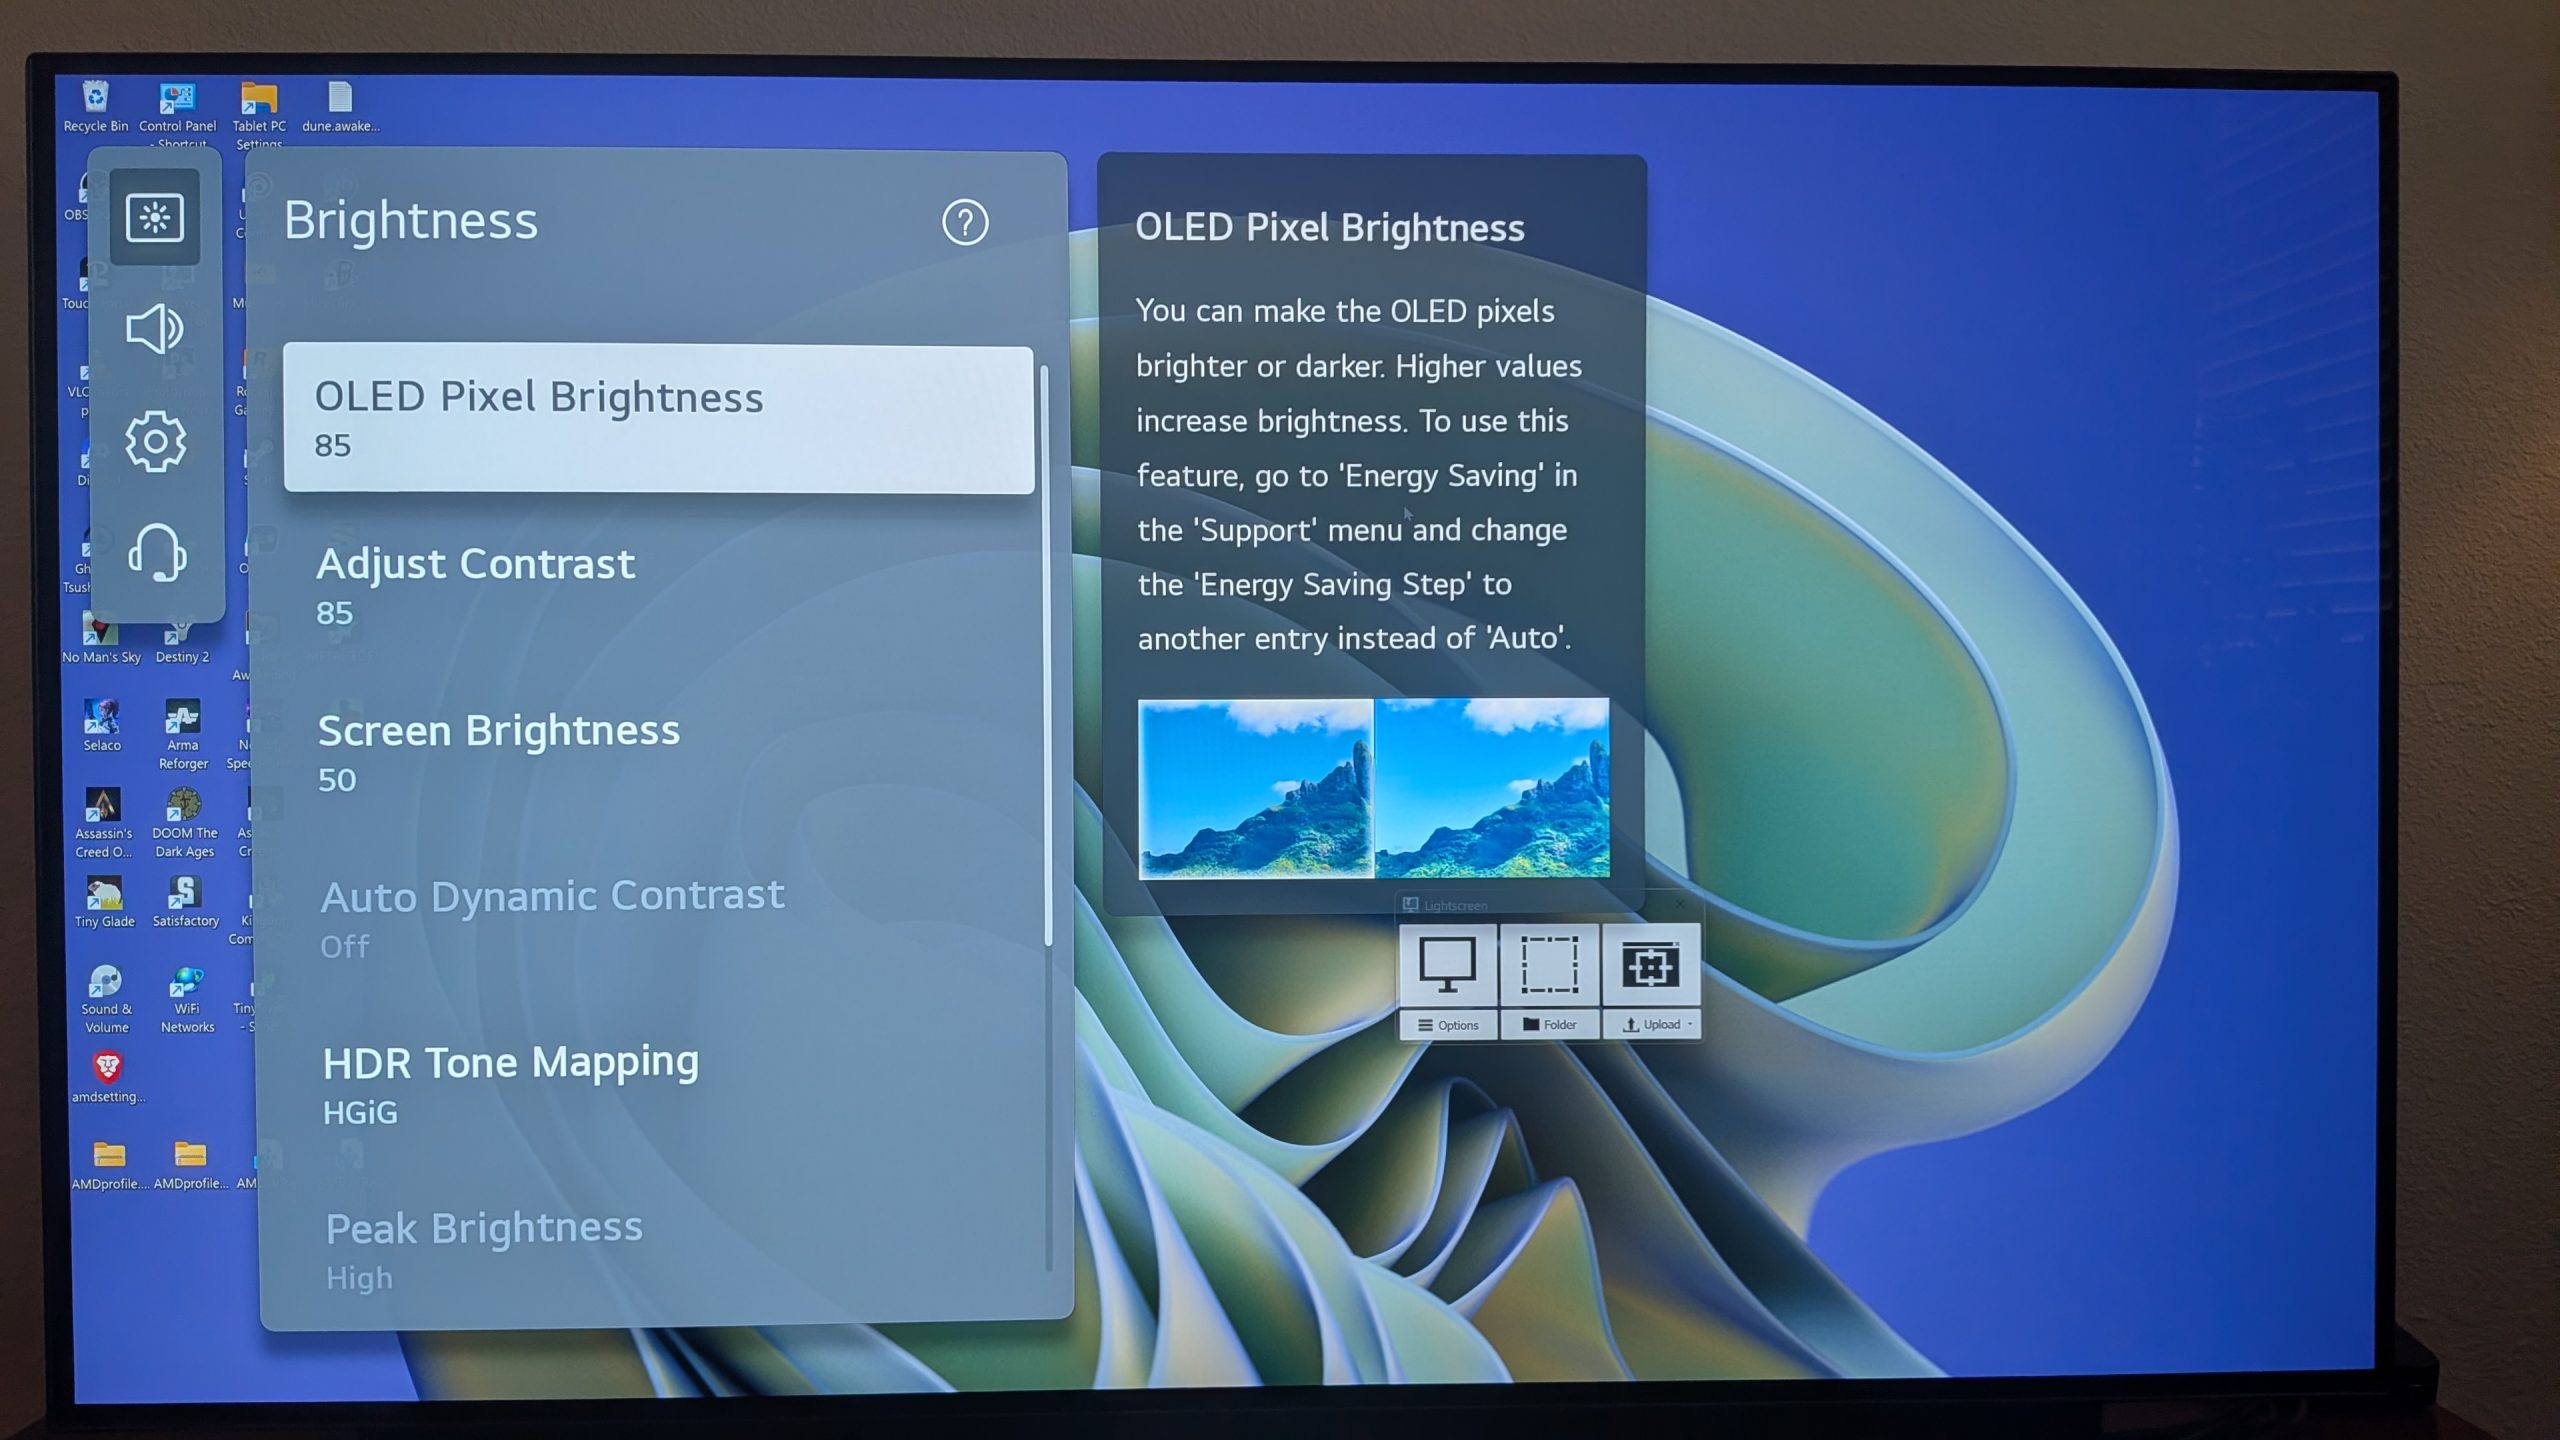
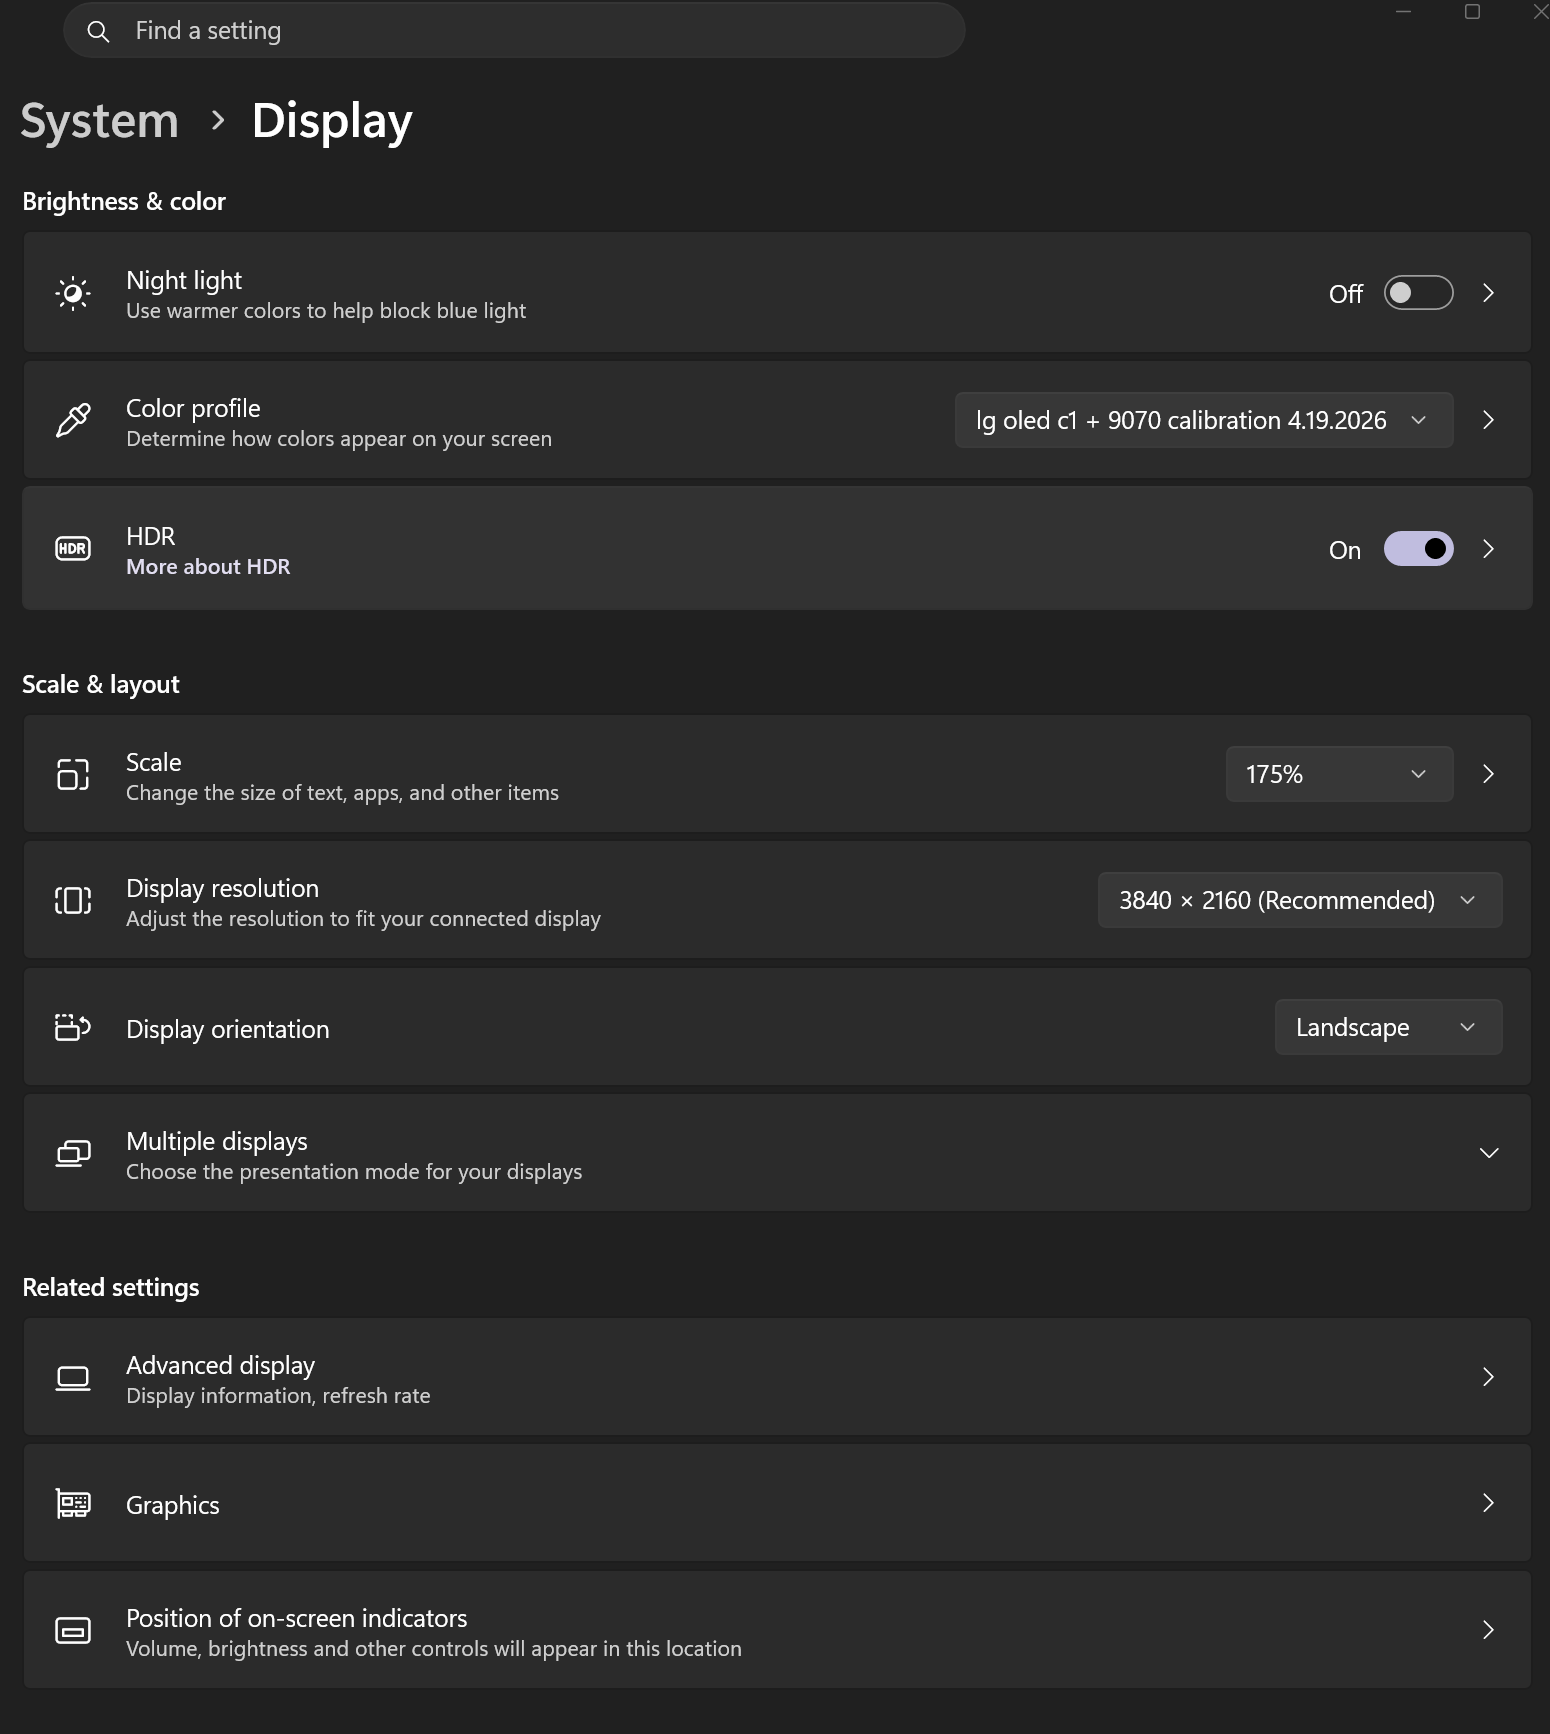
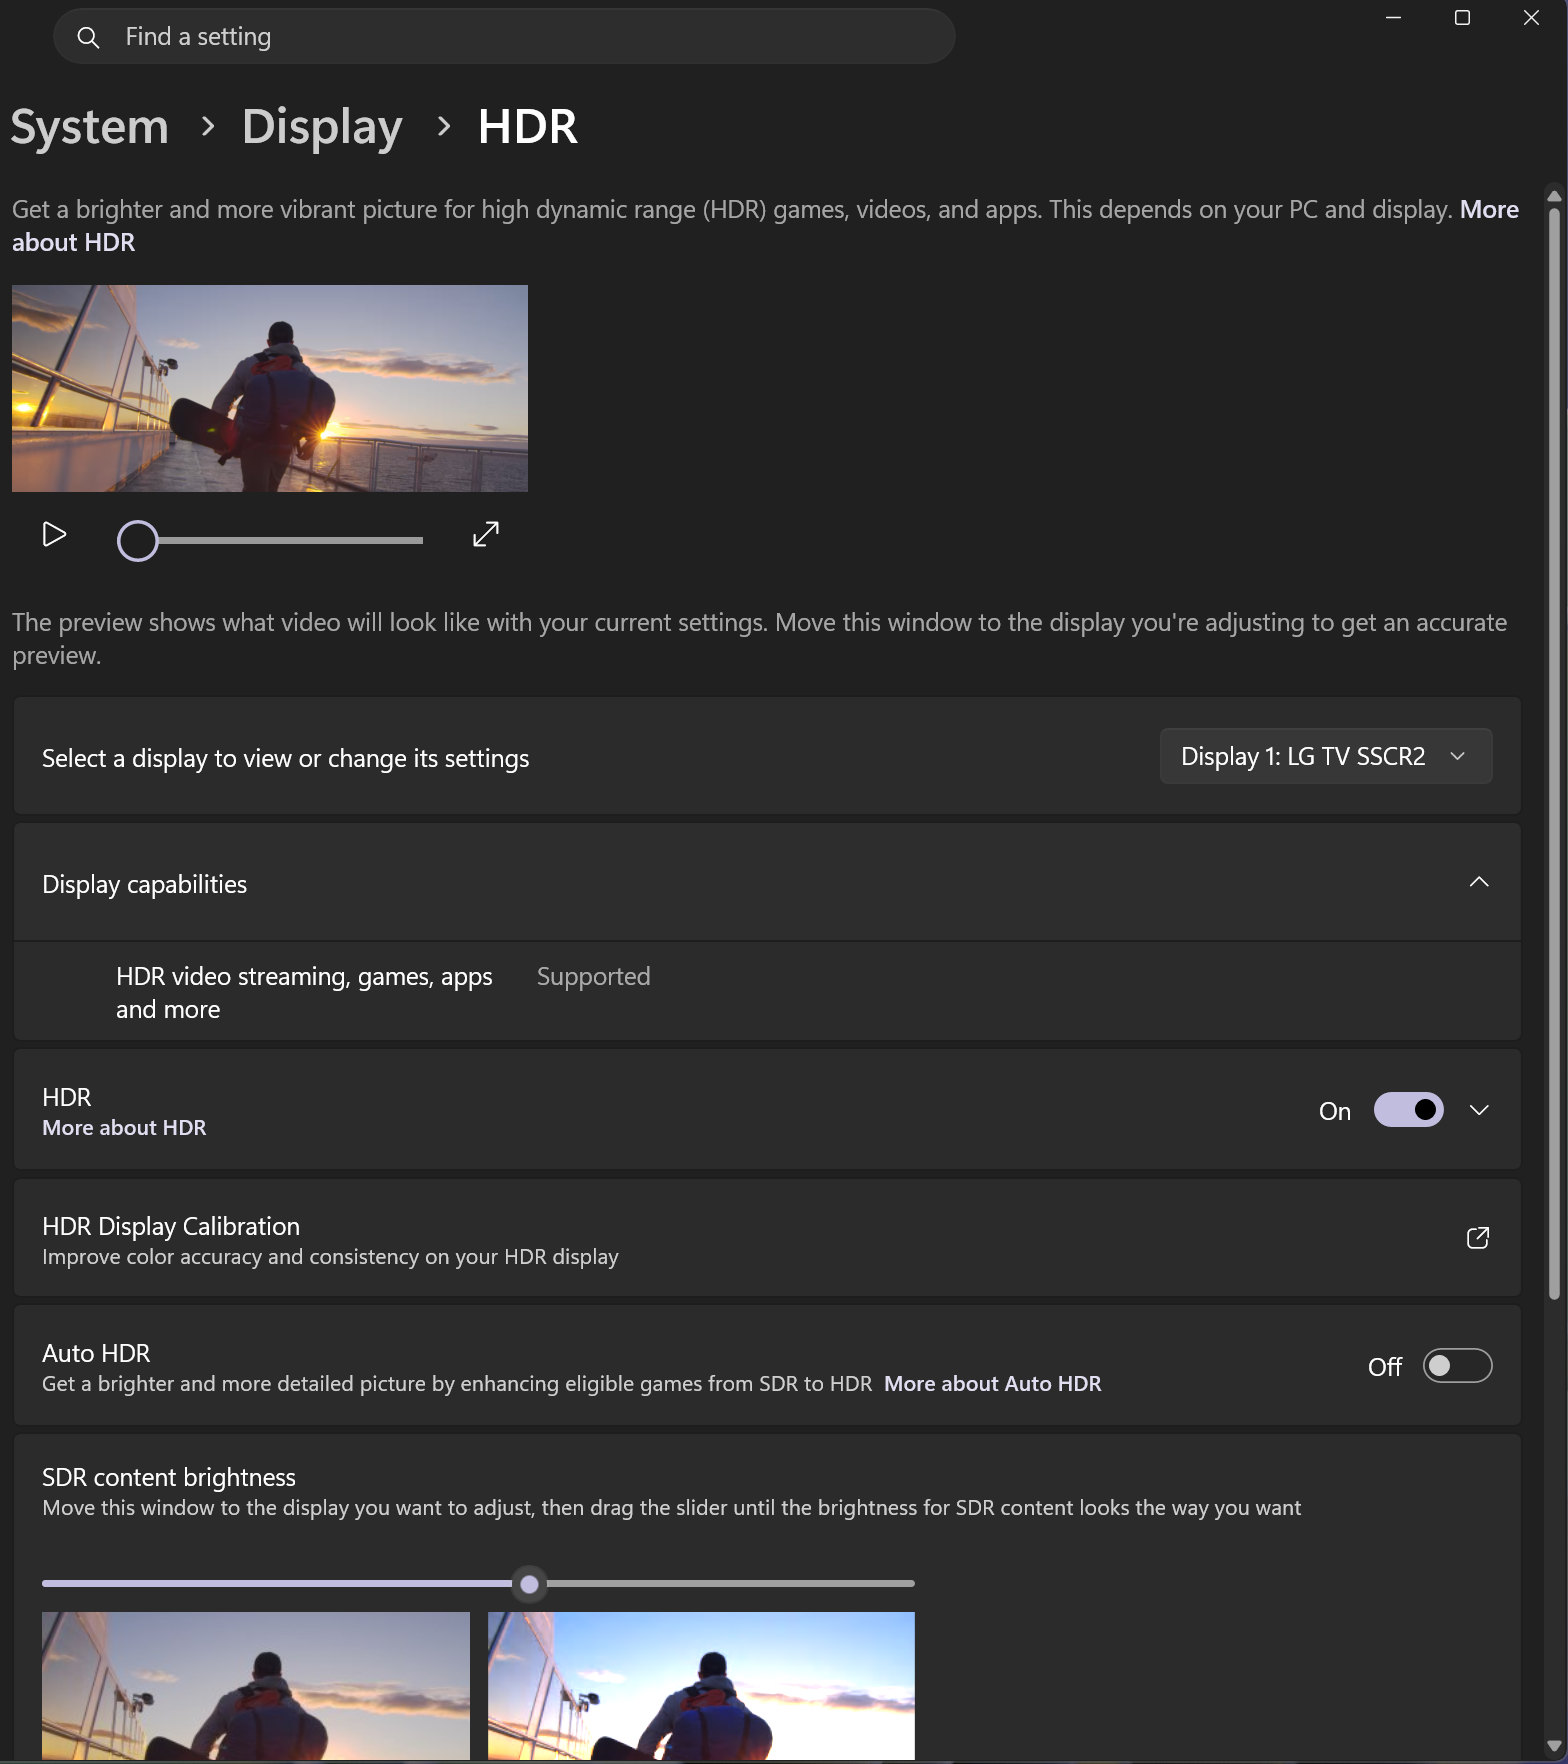
Here are my OLED tv settings that I think are relevant.
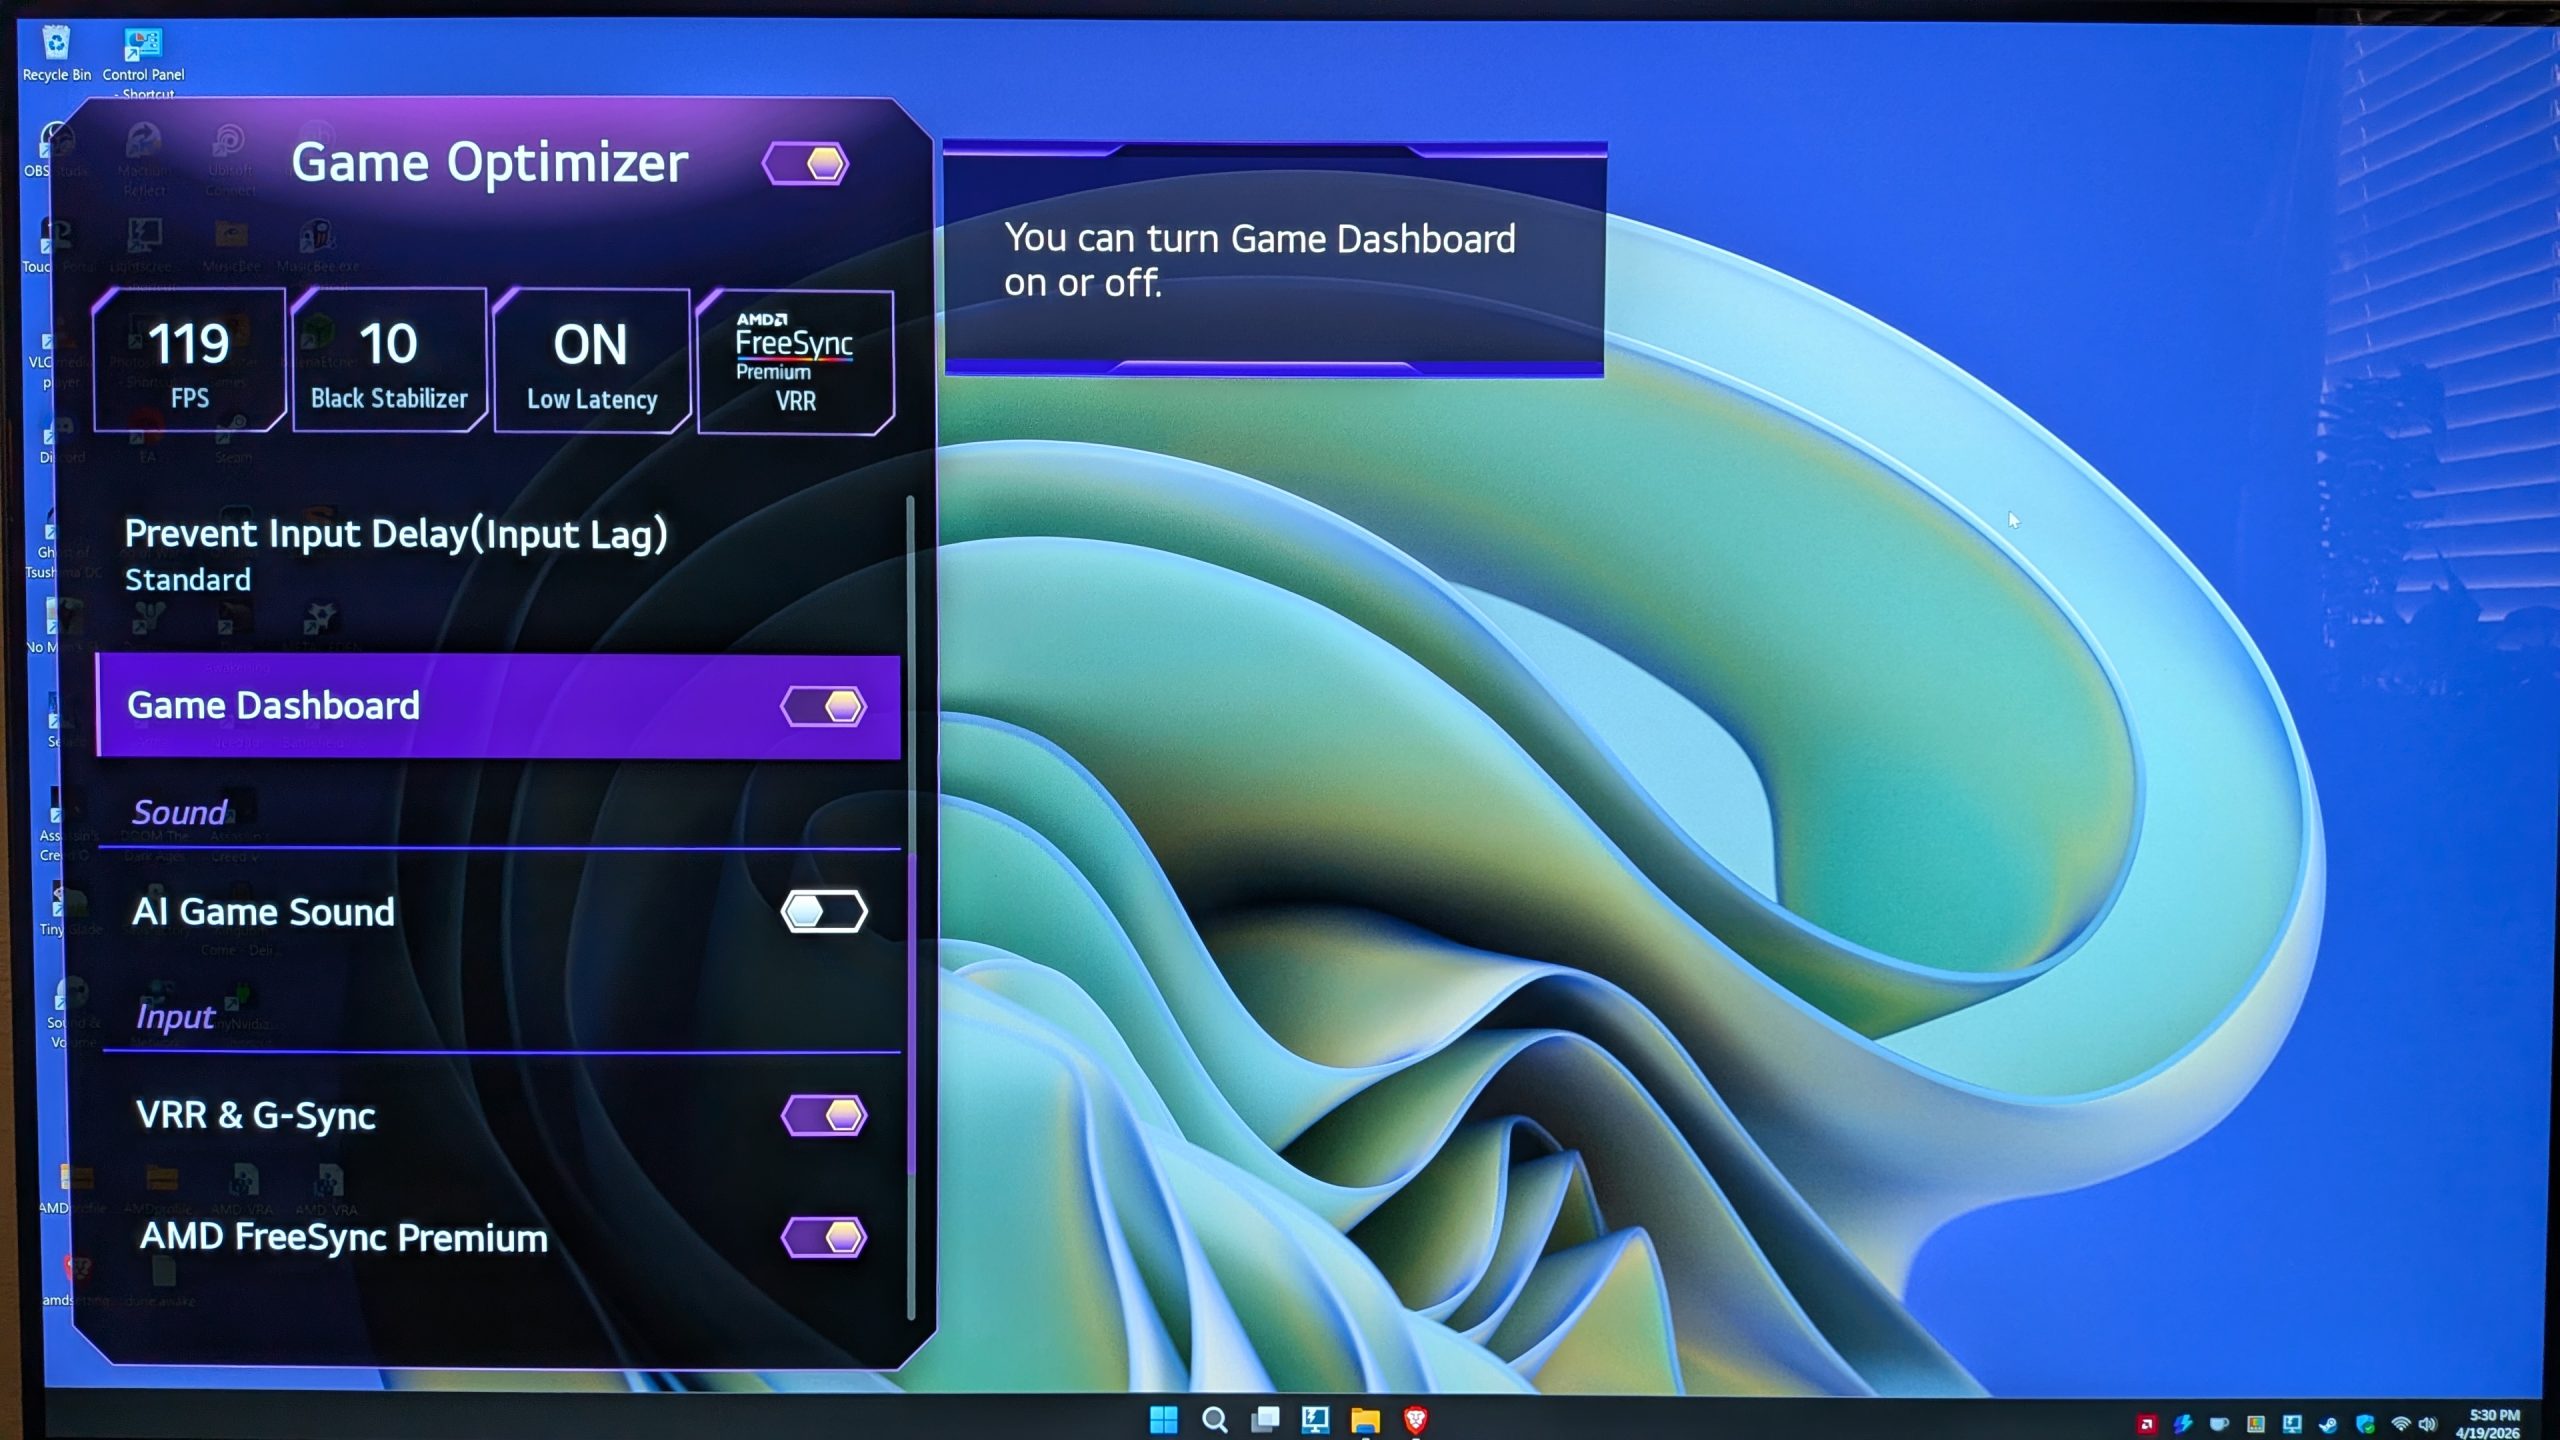
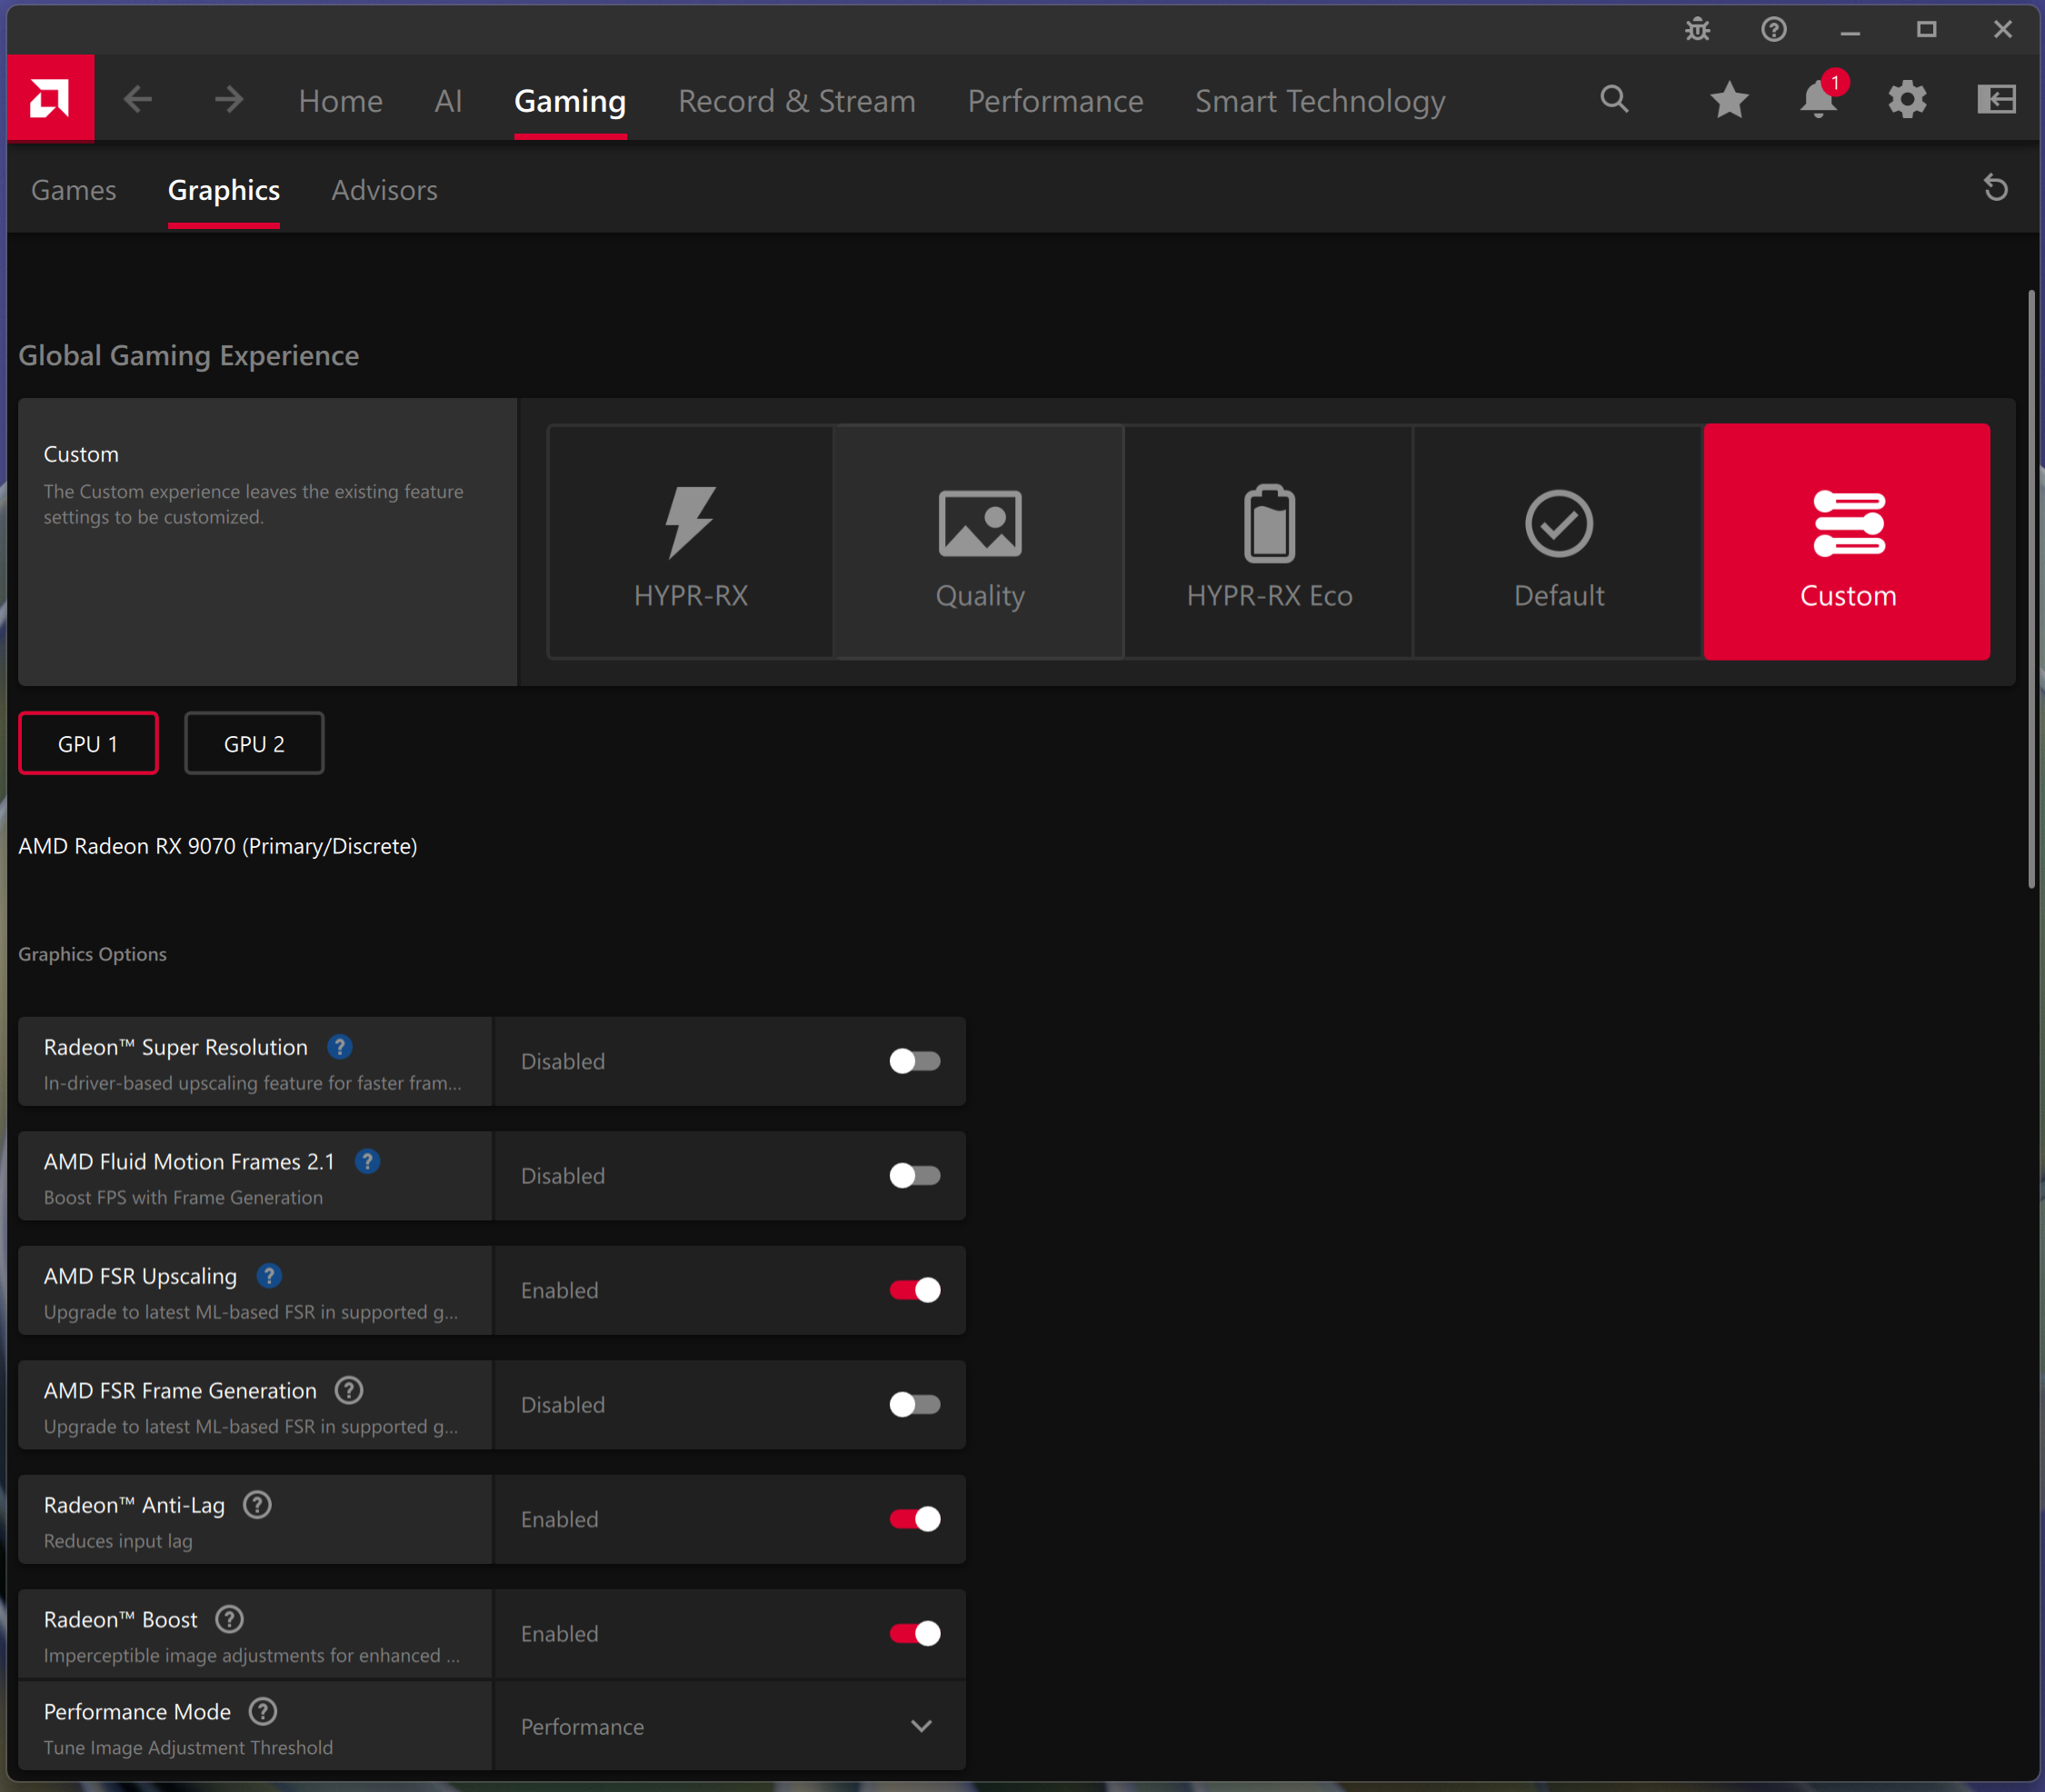
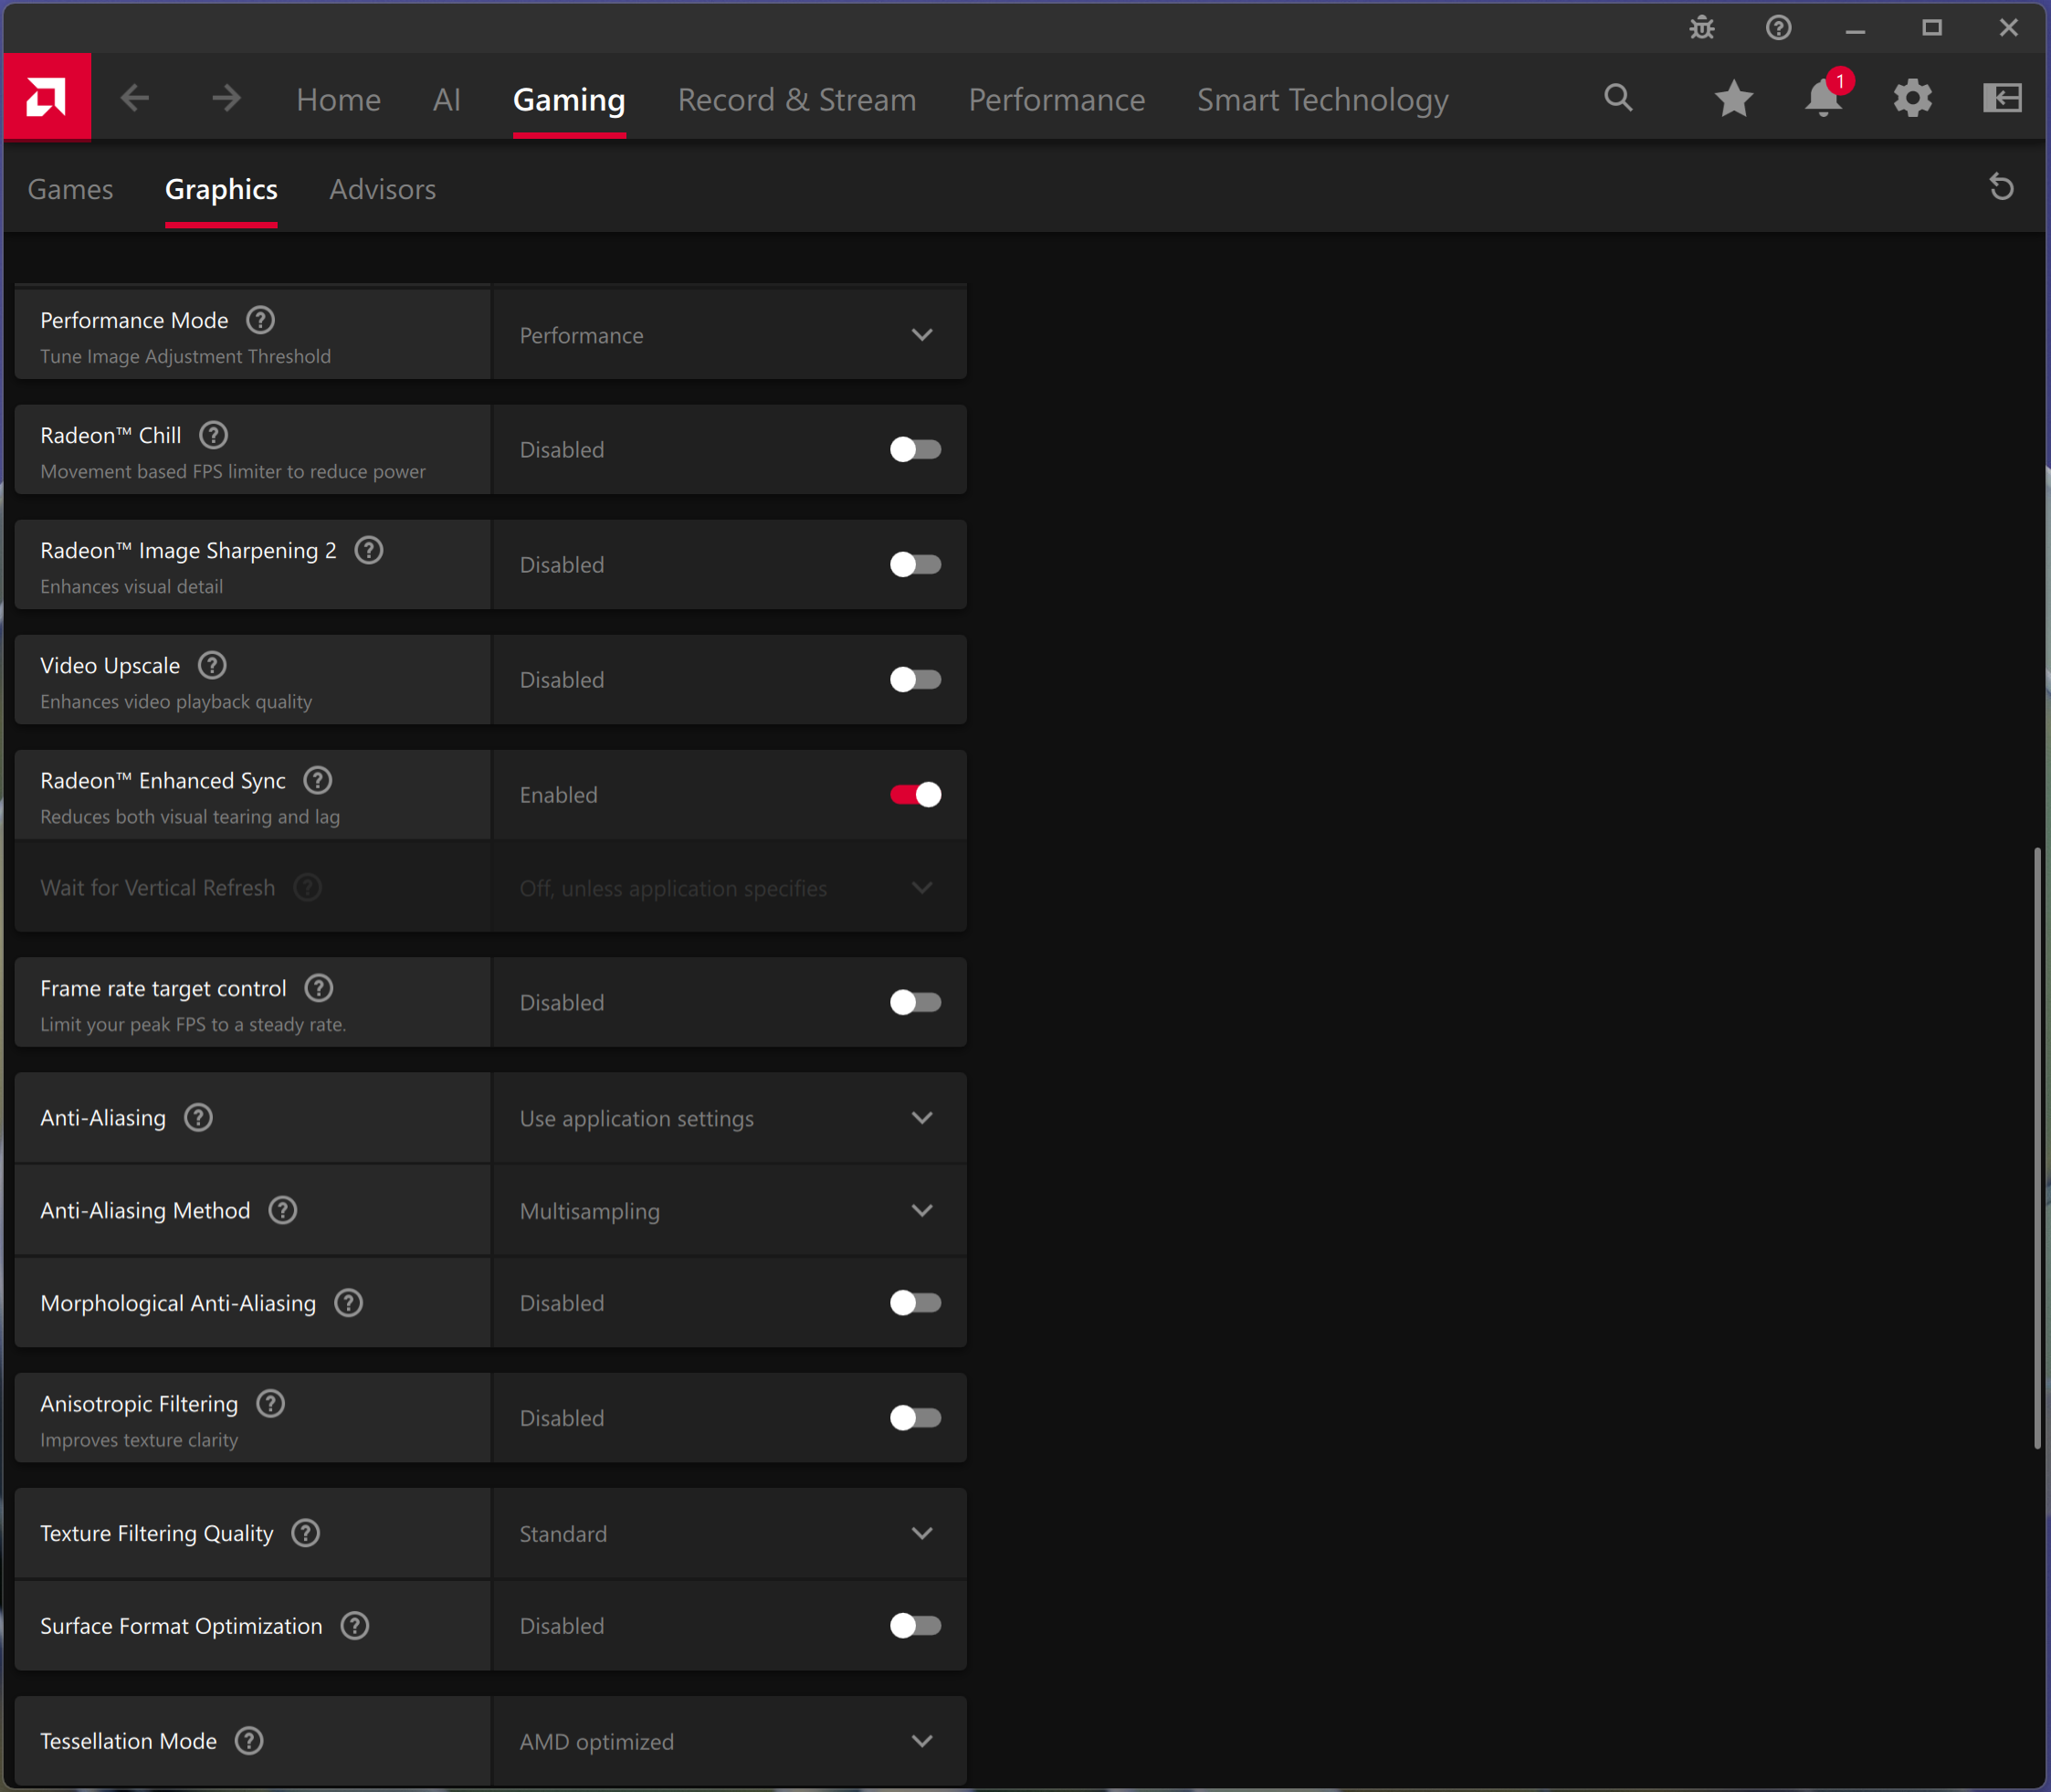
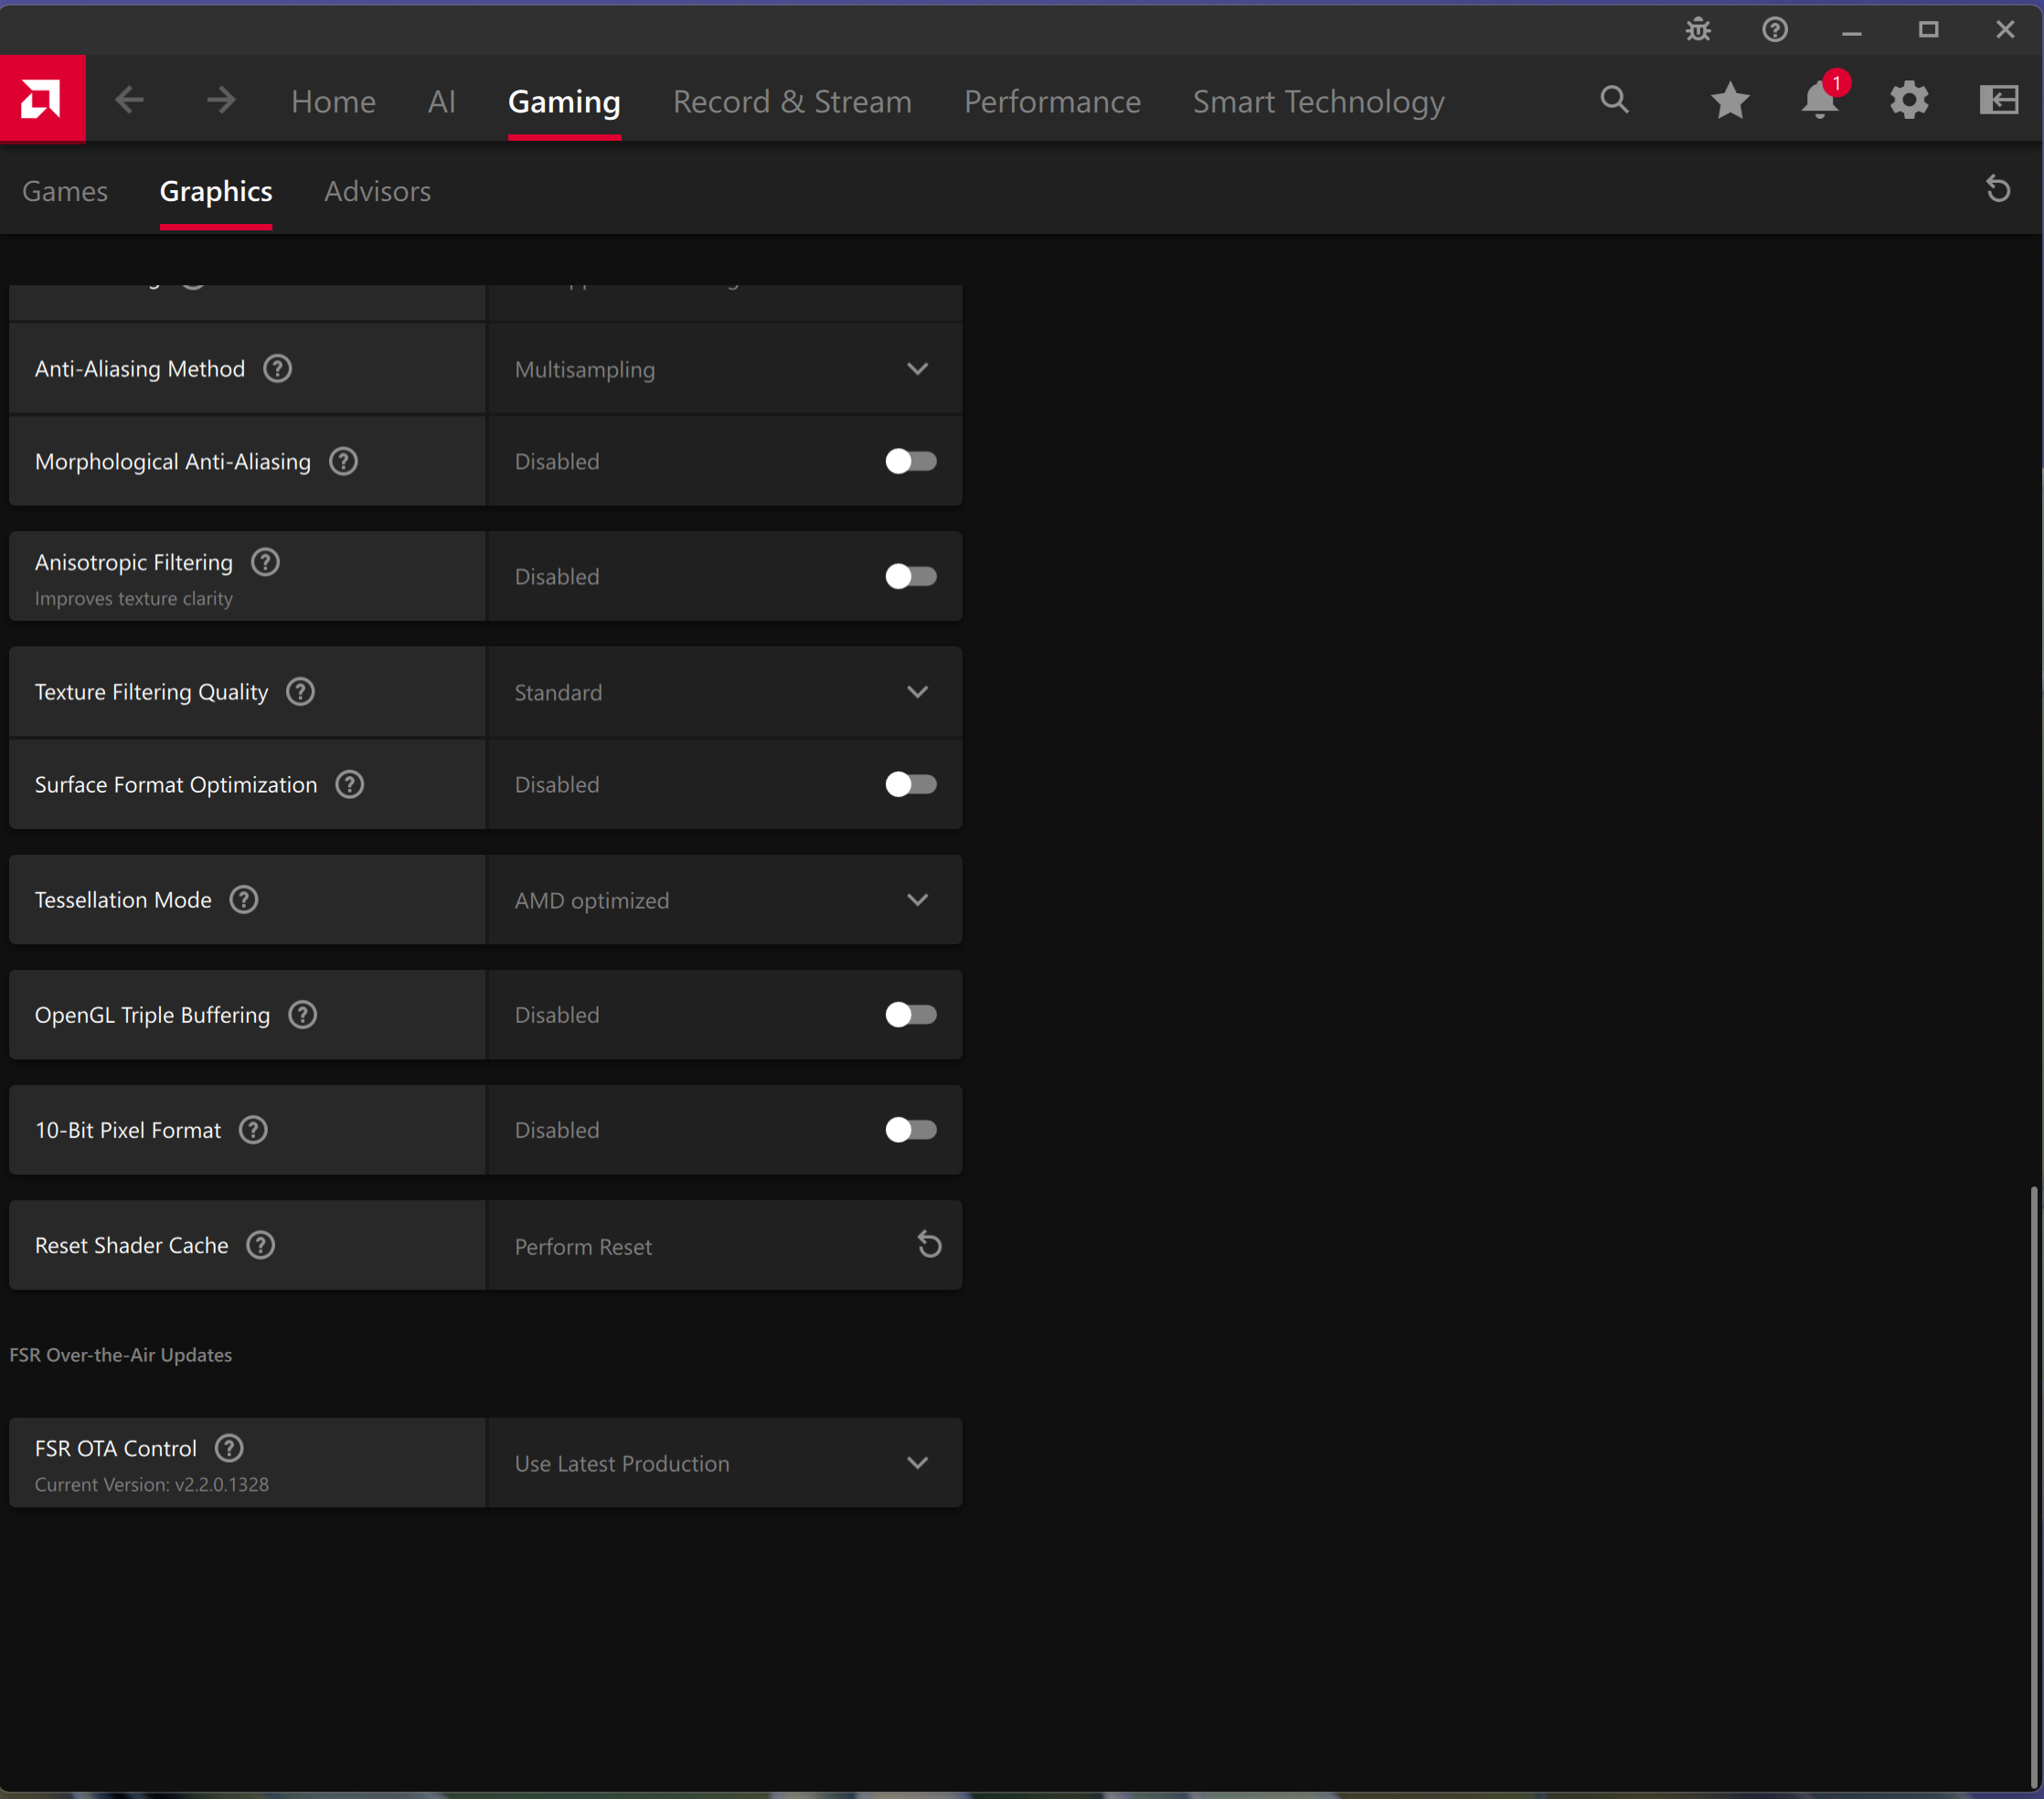
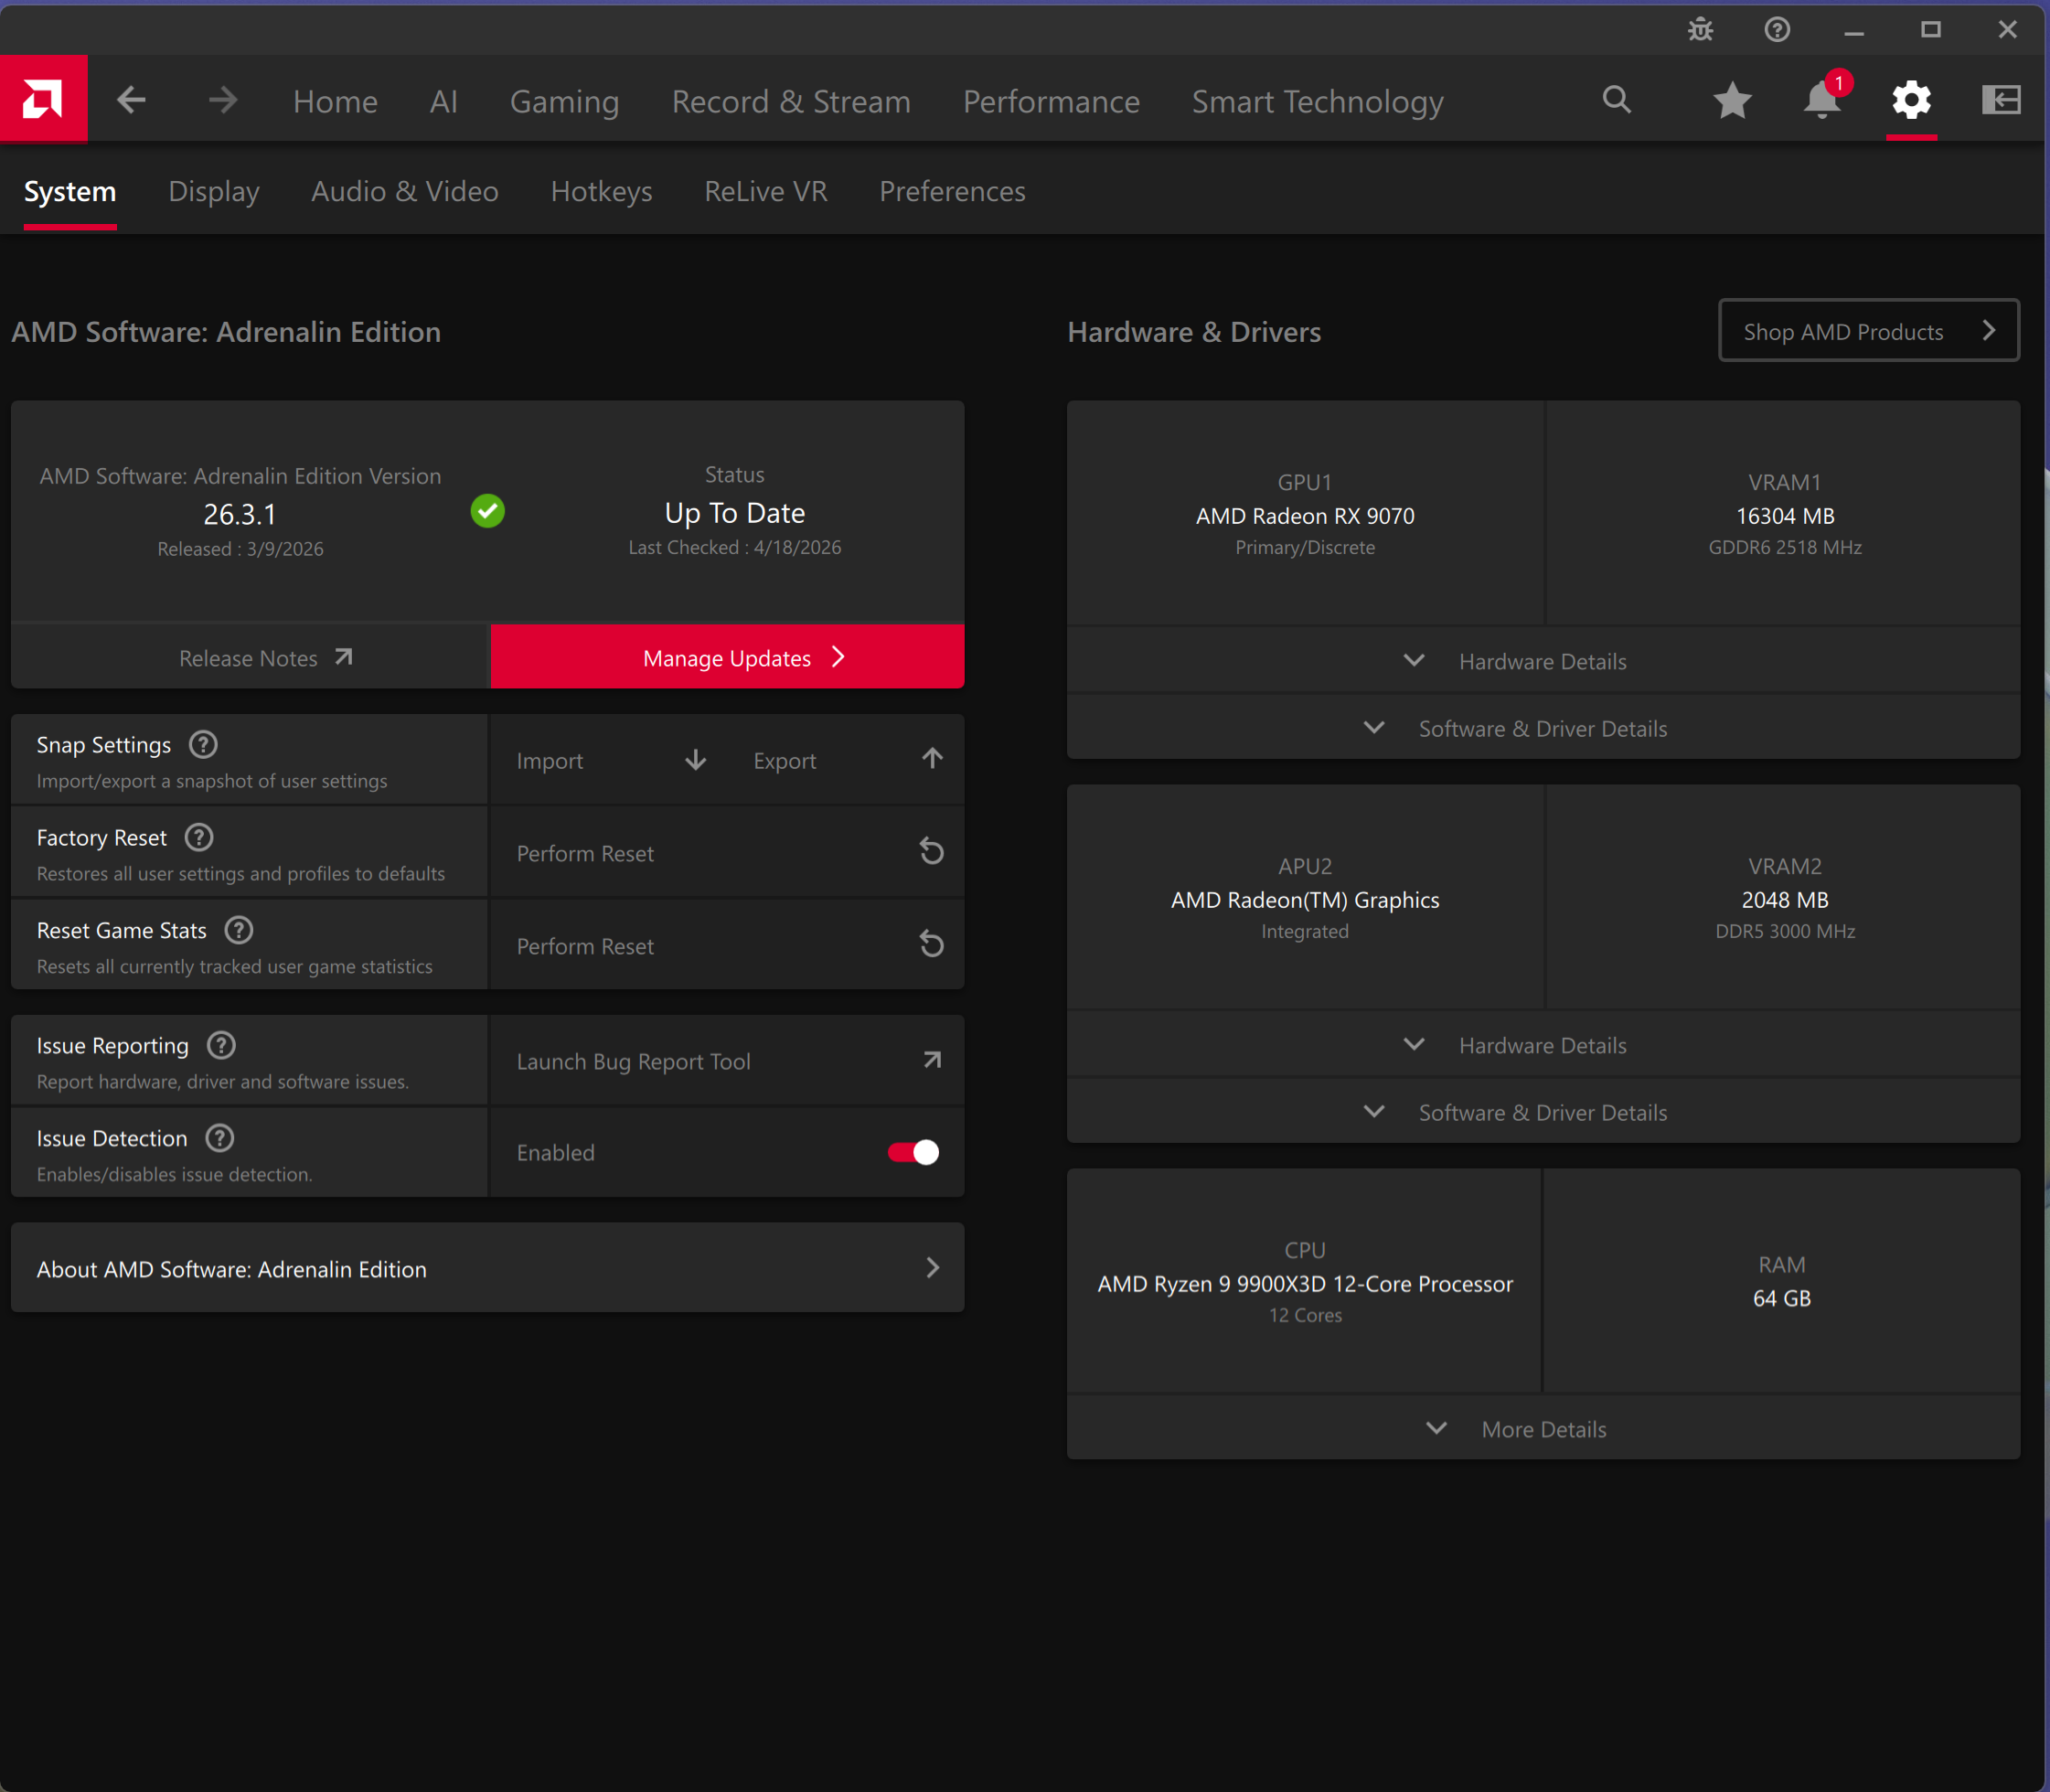
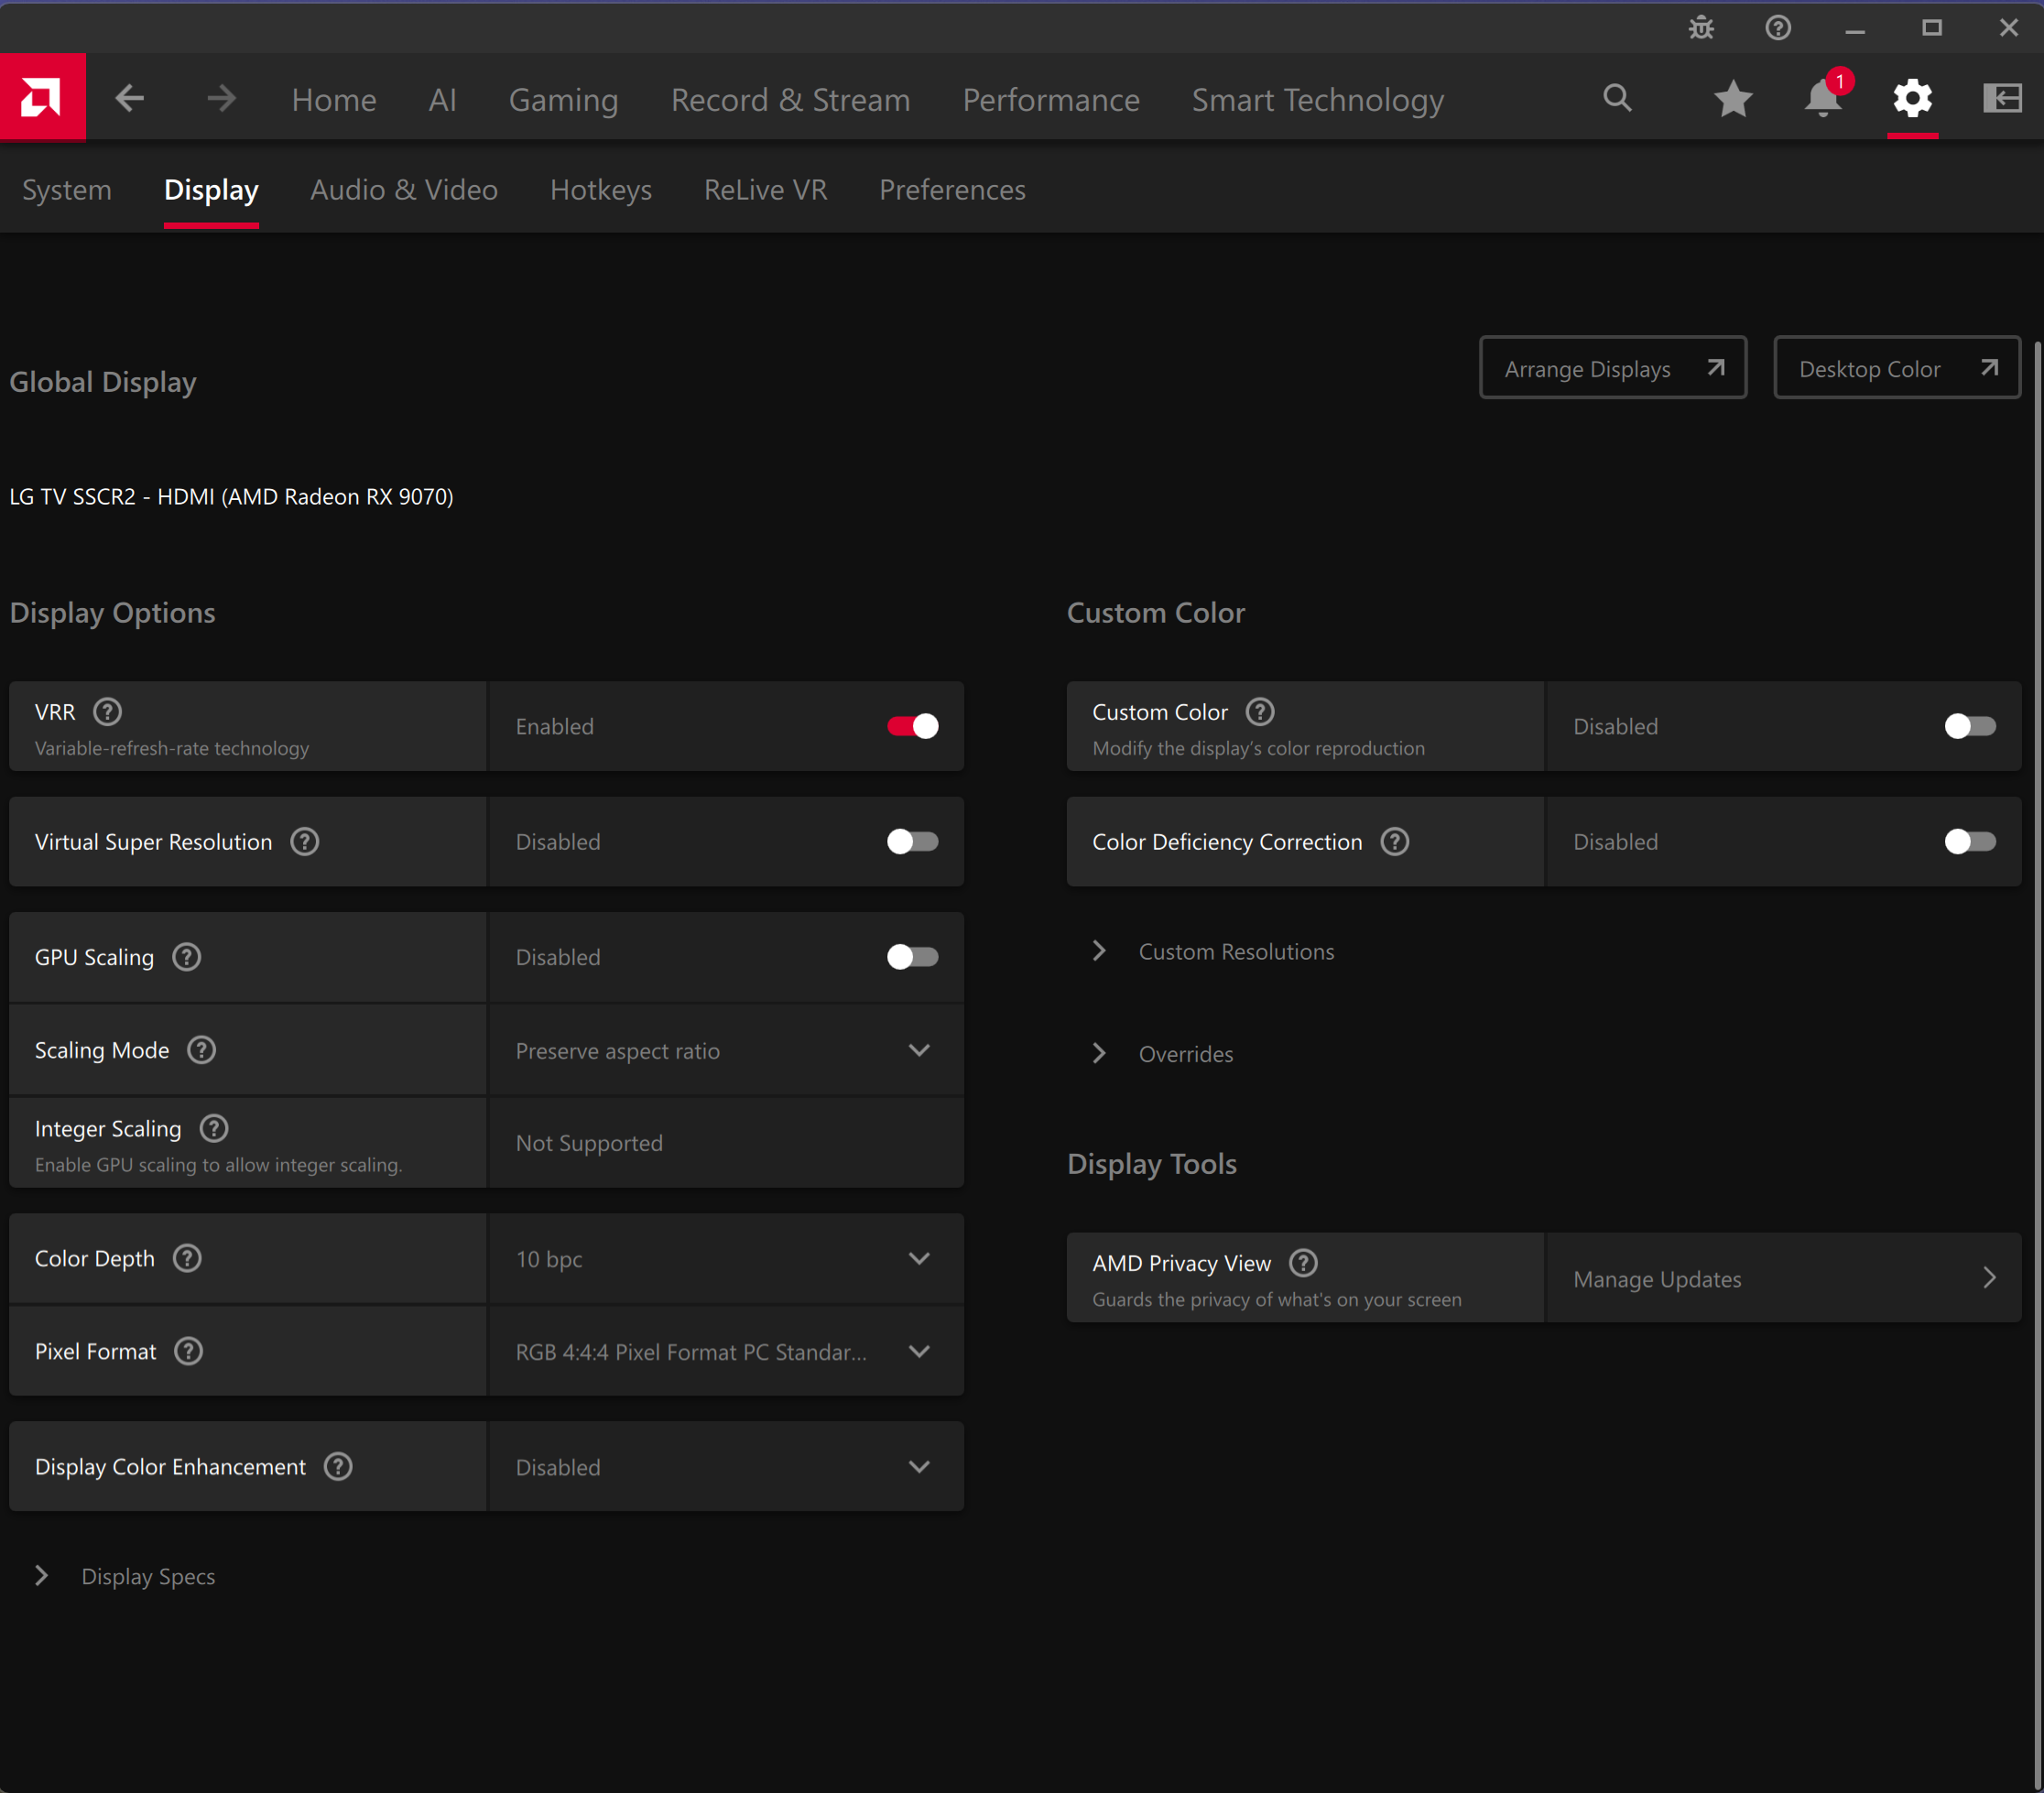
Here are my AMD Adrenaline Settings, I tried to keep everything as default as possible just because I like simplicity. I’m using global settings… if these settings fix Destiny for you but mess up another game just save them as a custom Destiny profile in Adrenaline.
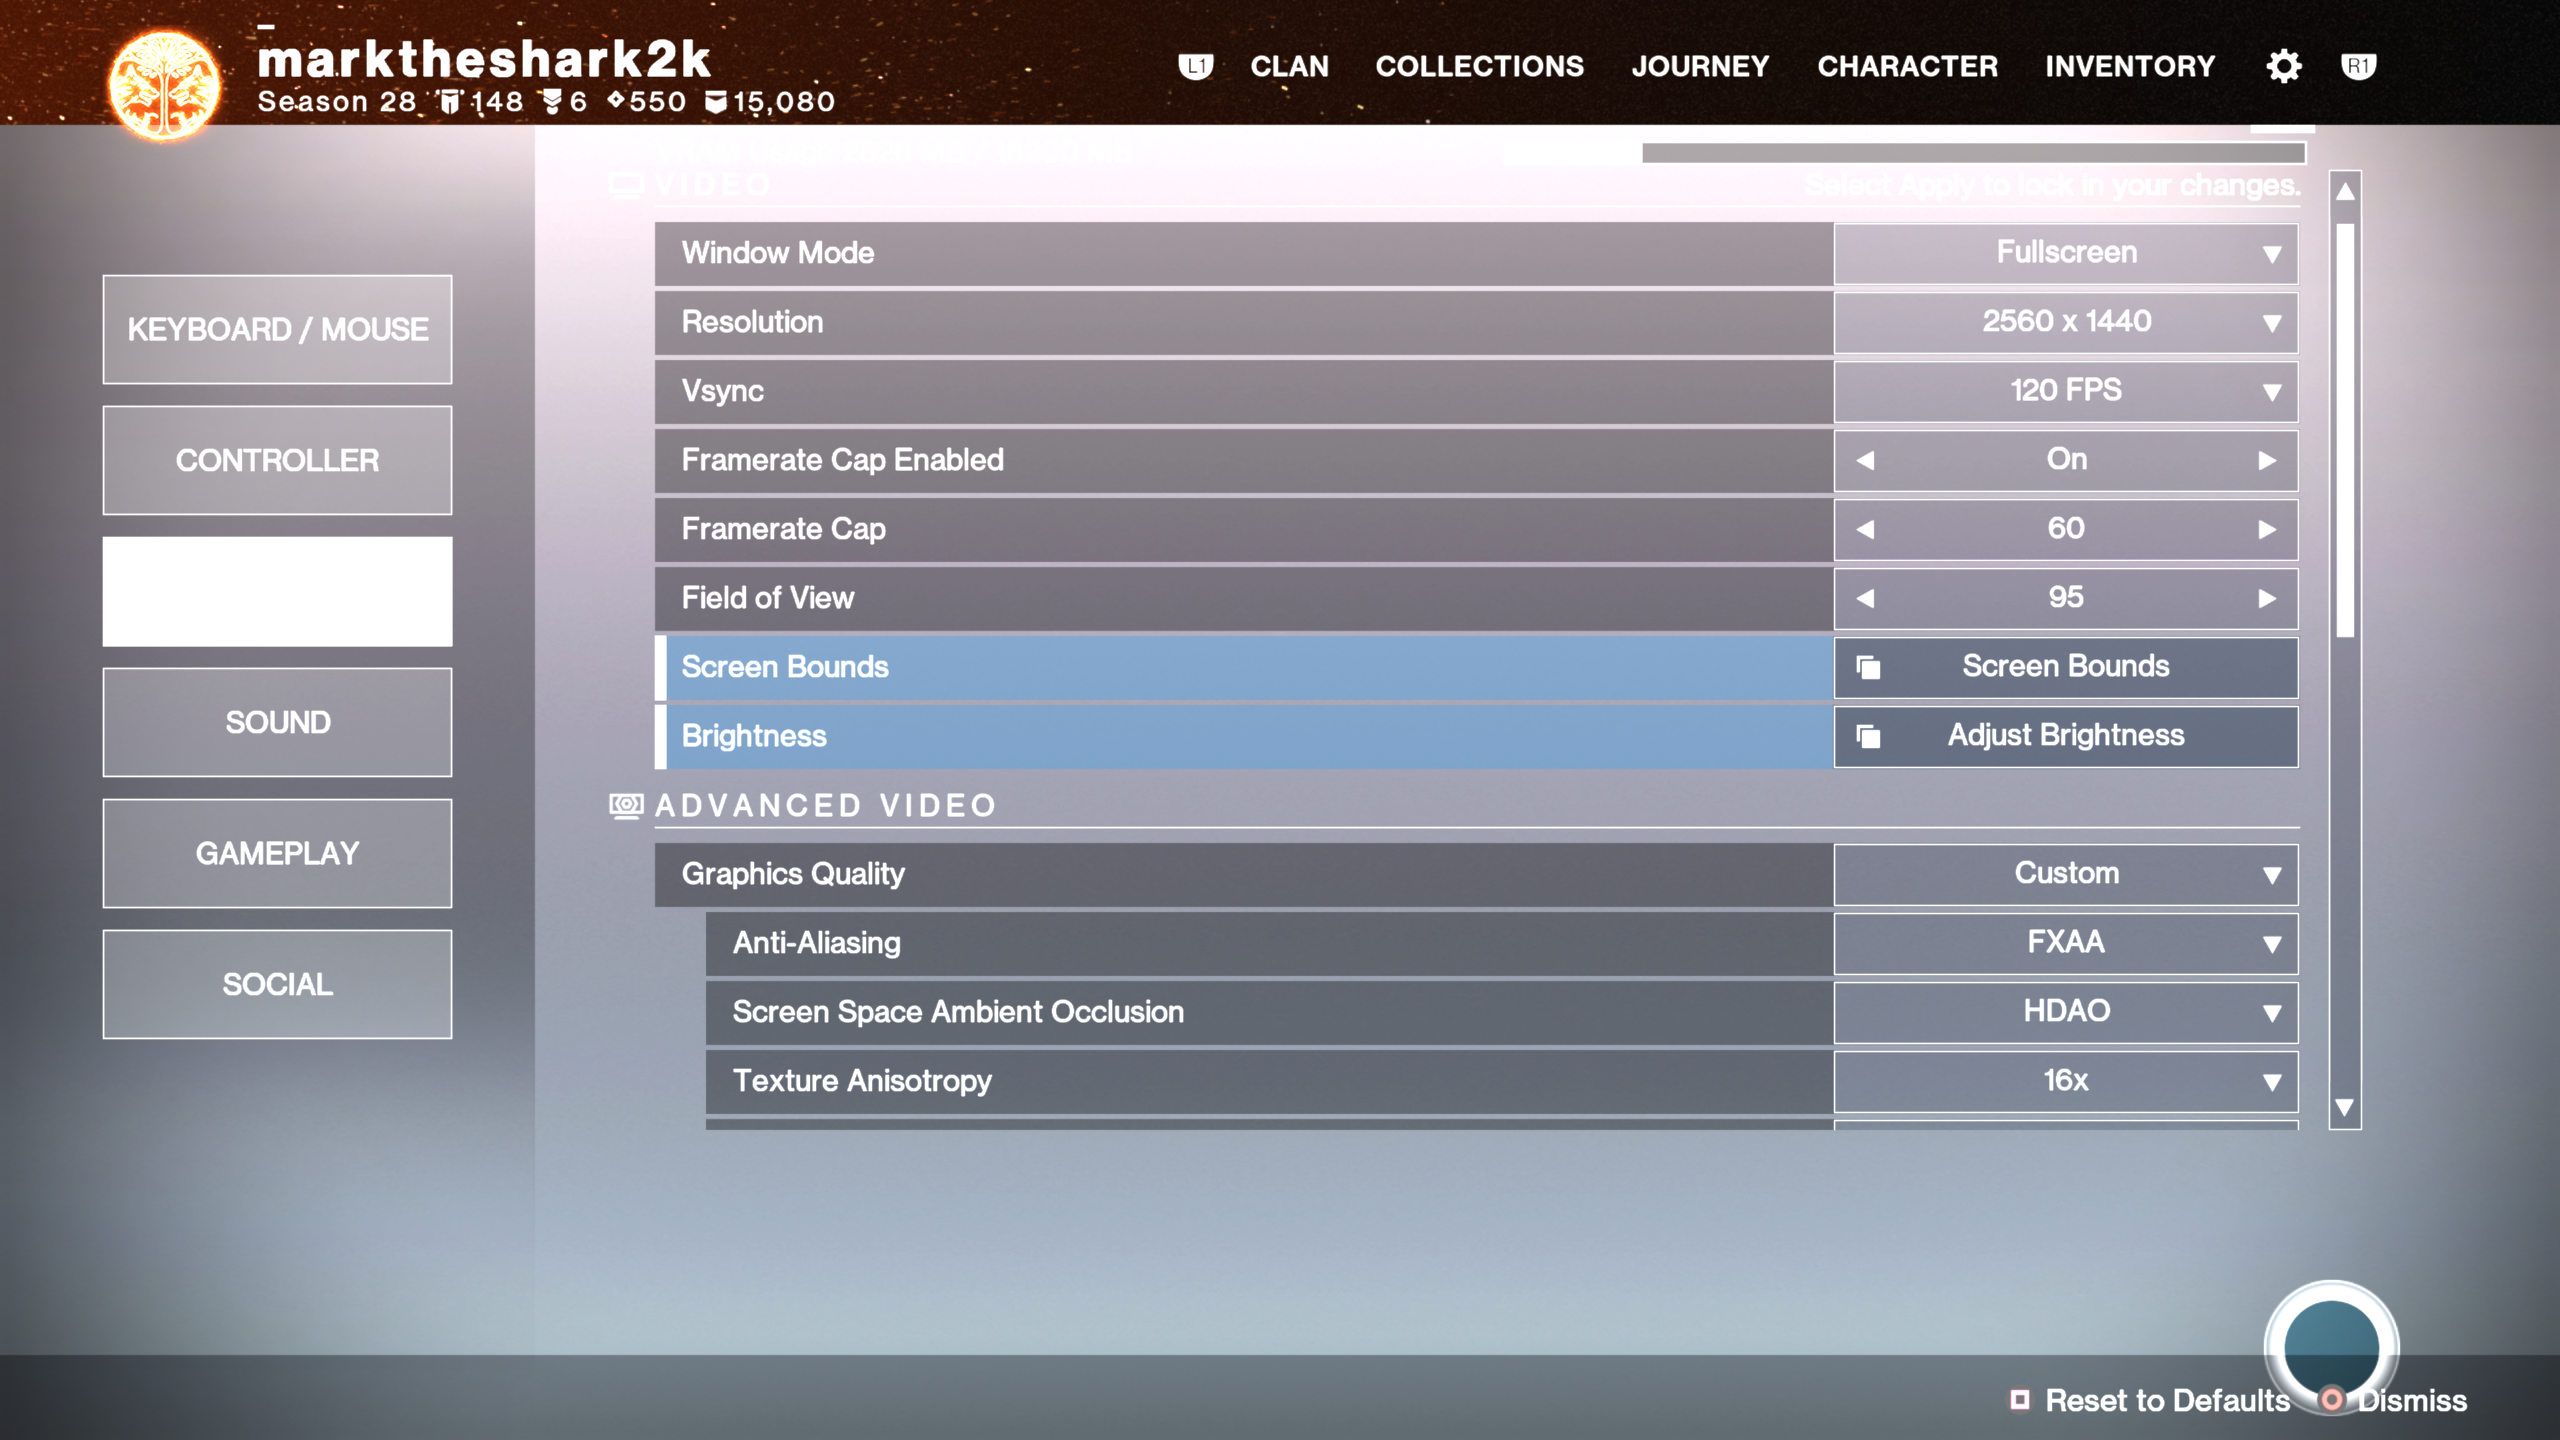
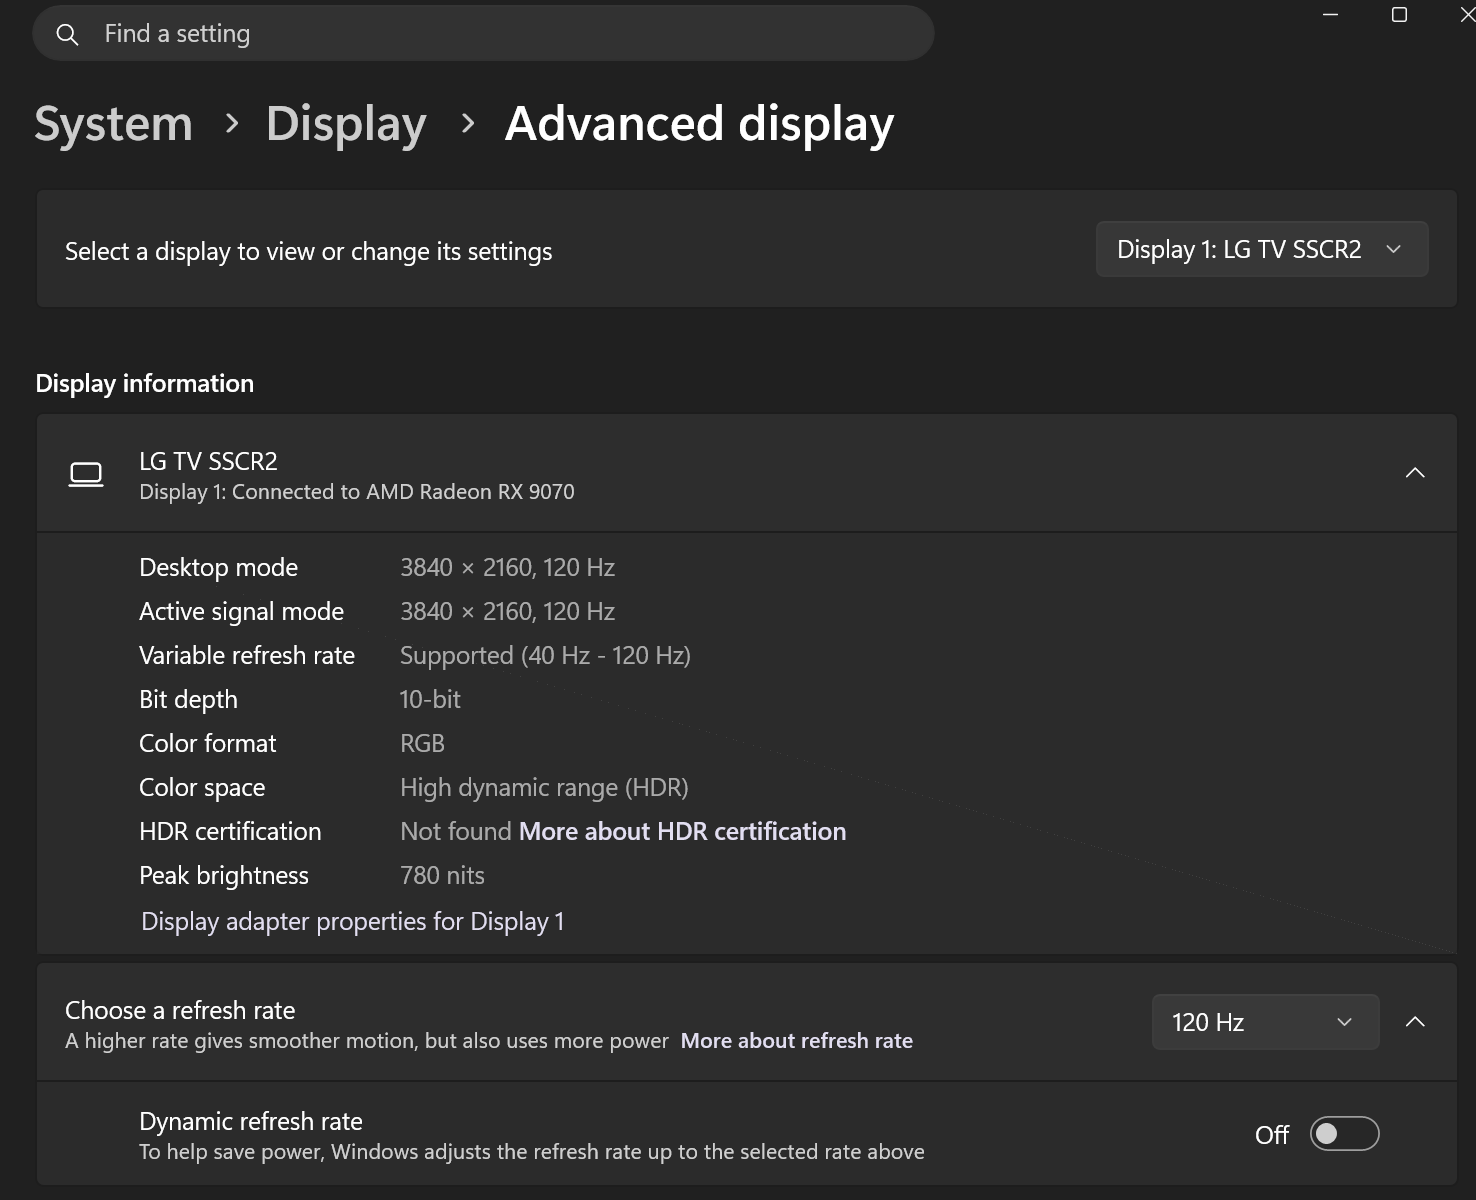
Finally here are my Destiny 2 settings and my Windows 11 Settings.

OK that’s all of them! After trying all these fixes I think it’s pretty much ironed out. I will probably update this page if anything major changes or I find a better fix so bookmark it and come back if you have more issues. I have a sneaking suspicion that it’s not the video card or settings, it’s an old game and I think there might be some weird chatter issues with VRR, GSYNC, Freesync and how they’re talking to the LG OLED C1.
I really hope that helps and again lmk down below if it did!
EXTRA Possible Fix
This is another fix from a guide I found online, it didn’t seem to make a difference to me. Try it if you want maybe it will help. I’m not 100% sure but I think it has something to do with Nvidia Reflex settings, I tried 0,1,2 and it made no perceptable change to me. Make sure you make a copy of the original xml file before you edit it, just copy, paste and rename it with .bak at the end.
This might or might not work, but it’s worth a try:
STEP 1: press Win + R on your keyboard, this will display Run input window
STEP 2: paste or type %appdata%\Bungie\DestinyPC\prefs
STEP 3: open CVARS.xml file in notepad, CVARS.old leave untouched
STEP 4: in the CVARS.xml file, find a line that says <cvar name=”low latency mode” value=1 />
STEP 5: change the value of 1 to 0, just by replacing the number
STEP 5.5: There is also another one you can try, however I tried it and all it did was make the screen flicker horribly so I turned it back to zero. <cvar name=”force_enable_multi_threaded_render_submit” value=”0″ />, if you want to try it change the value to 1 to force multi thread render.
STEP 6: save the file
What does it do? Low latency mode is a new game engine feature, from Nvidia called “Nvidia Reflex”.
It’s made to reduce input lag, by reducing rendered frames queue.
It makes the CPU and GPU to work very hard and creates insane load, that can lead to massive frame drops, and game instability.
This fix should provide better experience with higher and more stable frame rate.
If that isn’t enough, try capping your framerate to lower, fps cap should be in range that you can always maintain. This helps in reducing lag and stutters. Also your hardware won’t work as hard.
EDIT: I forgot to mention that Steam has also it’s own Shader Cache folder, that might be worth cleaning, if you followed instructions in a video above.
Directory: C:\Program Files (x86)\Steam\steamapps\shadercache
It might be on a different disk for you. This is basically a directory of Steam client.
You can easly get there by: Right click on Steam icon on the Desktop, then choose “Open file location”. Open “steamapps” -> “shadercache”.
Inside this folder, you will get folders with numbers in the names.
For me Destiny 2 is named 1085660. I’m not sure if its game ID, and if it’s static and the same for everyone. To make sure you can remove all folders there.
Leave a Reply