To Get from This

To this

You will need a little help from PCrivals, and stuff from these place

- two pipe ends
- one pipe flange
- two brass nipplets
- rubber tubing
total cost: $8
![]()
- one bilge pump
total cost: $25
![]()
- Goldstar GR-051SF
- two quarts rubbing alcohol
total cost: $66
You should also have the following available to you
- a circular saw w/metal cutting blade
- a drill w/ various bits
- blow torch
- duct tape
- solder
- epoxy
now lets get this started!
All trademarks belong to their respected companies.
We decided to start things off here at PCrivals with a bang. We figured we needed something that would grab your ass, and make you come back for more. After driving around for an hour, I came up with the idea to mount a computer inside of a cube fridge.
Erebus turned the car around and we headed to Wal*Mart.

I know what you are thinking.. “condensation is going to form all over your chitlins and it will fry”. We thought of that, and only we are stupid enough to try it, so read on. The cube fridge is going to take care of the components, but what about the processor? We swung around to Home Depot and picked up some plumbing supplies.

We picked up two copper pipe ends, a copper flange to fit them togother, 10′ of rubber tubing, and 2 little brass nipplets to connect the hose to the pipe ends. When we asked the guy at home depot for the parts we wanted, he said, “Let me guess… you’re making a bong.” Then we explained that we were going to put our computer inside a cube fridge. Needless to say he didn’t know why anyone would want to do that. So I told him AOL would run faster if you put your PC in a fridge and he was all, “I guess you learn something new every day”. And I was all _chuckle_.
Then there was a moment of uncomfortable silence.
Anyway, we got our things and were on our way. We decided to pump rubbing alcohol through the cooling system for two reasons:
- Because if it sprays all over the place, it won’t short out our shite.
- Alcohol can be chilled to way below the freezing temperature of water.
Back to Wal*Mart for that, but how are we going to pump it?
We thought of a fish tank pump, but those pump air.
The thought came to me after going to Napa Auto Parts.

We had originally gone to Napa to get brake lines. I was going to bend them up through a heatsink, to get the cold fluid right down near the processor, but decided not to for some reason. While browsing the shelves I found two rad items. A fan that runs on 12VDC and blows 230cfm, and a bilge pump that pumps 750 gal/hr, both of which were in the boating isle. We will use the bilge pump to circulate the alcohol through the cooling system. I dubbed the fan “The Blow Master” but when I got it home it was so loud it woke the dead, so I decided to save it for another project.
You need to pick up one of these from Wal*Mart:

Its a Goldstar GR-051SF, and its cheaper than a good computer case. We waited on line for an hour because there is a lot of white trash that live in the area. Plus the check out lady was fat and ugly. For this next exercise we will assume you have a circular saw with a metal cutting blade on it, and a carving knife.
We take no responsibility if you slip and dismember yourself. Having said that…. You will need to take off the door by removing the plastic cover that hides the door screws,
cut a hole in the door like so:
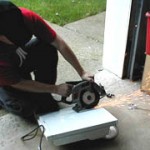
cut away the insulation on the inside of the door:

and mount your motherboard tray in it like this:
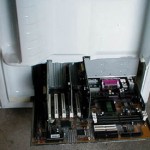
We didn’t have a motherboard tray, so we cut apart a case and made one. We will assume you are a crafty individual.
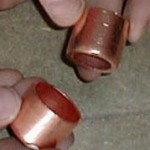
As Krypton85 was working on the case mod, Erebus was working on the processor cooling system. Using the parts from Home Depot, Erebus went at it. First he had to make the “heatsink” out of two pipe ends, and a pipe flange fitting. For this exercise we will assume you have a torch and some solder.
We take no responsibility if you catch your house or flesh on fire. You need to drill a hole on the end of one of the pipe ends, and on the side of the other. The hole should be the diameter of one of the nipplets, because you are going to have to hammer the nipplet through the hole.
Then you have to solder the pipe ends to the fitting so it is water proof. The nipplets are made of brass, and are tough to solder to the copper, so we used epoxy.
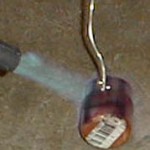

Attach the rubber hose to the nipplets, and epoxy the flat end to the processor. In this case, a celeron 500.
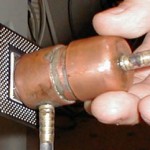
So we got all that done without anyone getting hurt. Well sort of. Take these words of wisdom: “don’t drip water onto molten solder” It tends to *pop* and shoot scalding hot solder all over.
You will need to remove the freeze plate from the inside wall of the fridge. It should just snap out, I had to pull on it REAL hard, but it finally popped loose.

After that is hanging free, you can bend it into the shape of the clear plastic tray that came with the fridge. We will call this the “freeze tray” from now on. It should look like this:
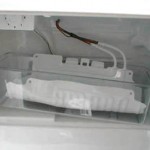
This is what we are going to fill with alcohol and submerge the bottom of the bilge pump in. Eventually it will look like this:
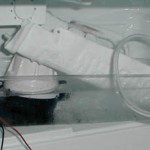
The feed line needed to be epoxied into the outlet of the bilge pump and runs to the nipplet mounted closest to the processor. The return hose should be mounted to the nipplet on the end of the heatsink and return the alcohol down the freeze plate into the pool.
Here is a shot of the mounted processor:
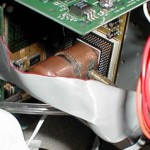
By now you can mount your hard drive mount from your case inside the door of the fridge. We did it like this:

A hole drilled into the back of the fridge makes a perfect spot to slide a power cord through.
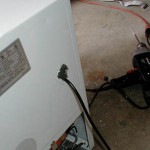
WARNING: When drilling through metal, DO NOT use a drywall drill bit, you will tear your arms off, and send the drill flying.
We know from experience.
You then need to put your drives in there and connect all the cables. We removed the power suppy from its case and mounted it naked inside the frond door. Take a look:

If you notice, we had to drill holes in the front of the door to get the power switch and LEDs out. By now the project should look something like this:
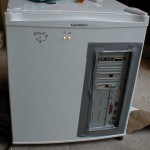
The duct tape was added so that we woulden’t lose any of our precious cold air.
If all goes right, and you didn’t screw up, you have just built yourself the perfect overclocking machine.
Check out these temps we got while running the Computerator:

That’s pretty damn cold. When I first saw the temp I thought it was positive 17.9, but when I saw the negative, I creamed my pants. Just imagine pumping that across your cpu! If you imagined correctly, you imagined this:
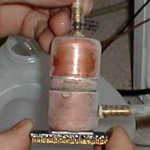
Yes, that is ice on the outside of the heatsink, we also got ice on the underside of the CPU. But not to worry, you only get condensation when you turn off the refridgerator.
While everything is running, we have NO problems with condensation. We left the Computerator on over night and all was well. So if you are going to be turning this beast off, remember to unplug the powersupply, and let it dry off before powering up again.

Would like to have permission to use the photo of the refrigerator with the insulationshowing after part of the door is sawed off.
Am creating a teaching site for children to explain plastics insulation used to keep refrigerators efficient.
Need to hear back ASAP please or by Friday morning, April 4th.
thanks!
Sure, you can go ahead and use it, if there’s a way you can link back to my site that would be great too.
this is genius